Weaving on your Loom
〰️
Weaving on your Loom 〰️
Thank you, Maker Faire Weavers!! You are awesome!
I have updated this page fully with photos and detailed instructions; and the PDF is available for download below.
Sincerely,
Your new weaver friend, Sally Garner
Thank you for supporting my creative journey! You’ve gotten one of my laser cut loom kits… now what? If you’ve never used one of these types of handheld looms before, I have put together a detailed, step-by-step guide on how to use this loom, with helpful tips on how to experiment with your weavings and options on how to display your masterpieces!
This page represents that step-by-step guide, but if you would like to download/print these instructions, please use the link below for the PDF version.
THE ANATOMY OF A WEAVING
A woven fabric is made up of interlaced threads. The vertical threads that are tied to the loom (to weave through) are called the warp. The threads that get woven through the warp are called the weft.
The side edges of your weaving are called the selvedge. See the “tips for weaving” section towards the end of these instructions for info on how to keep the edges of your weaving straight, as this is a common issue.
There are many types of looms out there, but this loom is typically considered a frame-style loom for tapestry weaving.
THE LOOM PARTS AND TOOLS
Your kit comes with several weaving tools, some optional accessories, potentially some yarn(s), and of course, your new frame loom.
The loom!
Shuttle stick
Shed stick
Reeds (they look like combs) in various sizes
Needles in various sizes – these can also be used as bobbins
Two optional feet – to prop your loom upright on a tabletop
The instruction QR code tag
One of the most fun parts of weaving is picking the colors of your warp and weft! Experiment with different color combinations and interesting textures. Because the warp is under tension while using the shed stick, I highly recommend using a warp thread that is strong! Cotton is usually a good choice, but you can test different yarns out to see if they break too easily when you pull against them. Finally, the warp thread should be a bit on the thinner side, mostly so that the warp sits securely in the loom’s notches.
My favorite warp to use is a “carpet warp” of 100% cotton. Amazon has options, and many yarn stores that stock weaving supplies will have them and can usually ship them to you if they’re out of state. Again, the main point is that the warp is strong enough to resist breaking if you put it under a lot of tension. But there are ways to weave with less tension, so really anything that can fit in the notches of the loom can be your warp!
SETTING UP THE LOOM
Every time you begin a new weaving, you will need to set up your loom with new warp thread.
Tie the end of a warp thread to one of the side edges of your loom. Notches have been made on the top and bottom of both sides so that you can tie the warp in place without it shifting. Use any of them to tie on!
Once your warp is tied to the loom, find the closest notch on the top/bottom of the loom that is near your tie-on location. You will wrap your warp through that notch and around the back of the next peg/bump in the loom, with your extra warp on the front side of your loom.
Cross from top to bottom (or bottom to top) so that the warp thread spans vertically over the large hole in your frame loom. The inside of the frame loom is where your weaving will take place.
In the notch opposite the one you just came out of, you will then wrap your warp towards the back of the loom and around the next peg/bump, and back towards yourself (the front) in the next notch.
Cross the loom from top to bottom again and repeat these steps (4-5) again and again until your warp fills up your loom.
Tie the warp around another notch in the side of the loom, closest to your last top/bottom notch, and cut excess thread off.
The thread should only cross from top to bottom on ONE side of the wood (the front of the loom), not both sides. The thread will wrap around the pegs/bumps only on ONE side of the wood, which should be the OTHER side of the loom (the back).
The image below shows what your warped loom should look like! While the loom is fully filled up in this example, you can also warp your thread every other notch to have more space between warp threads (best for when you’re using really large/thick weft threads), OR you may want to warp a smaller section of the loom to make a weaving with a smaller width (for example, a woven bookmark would need to be skinny and long).
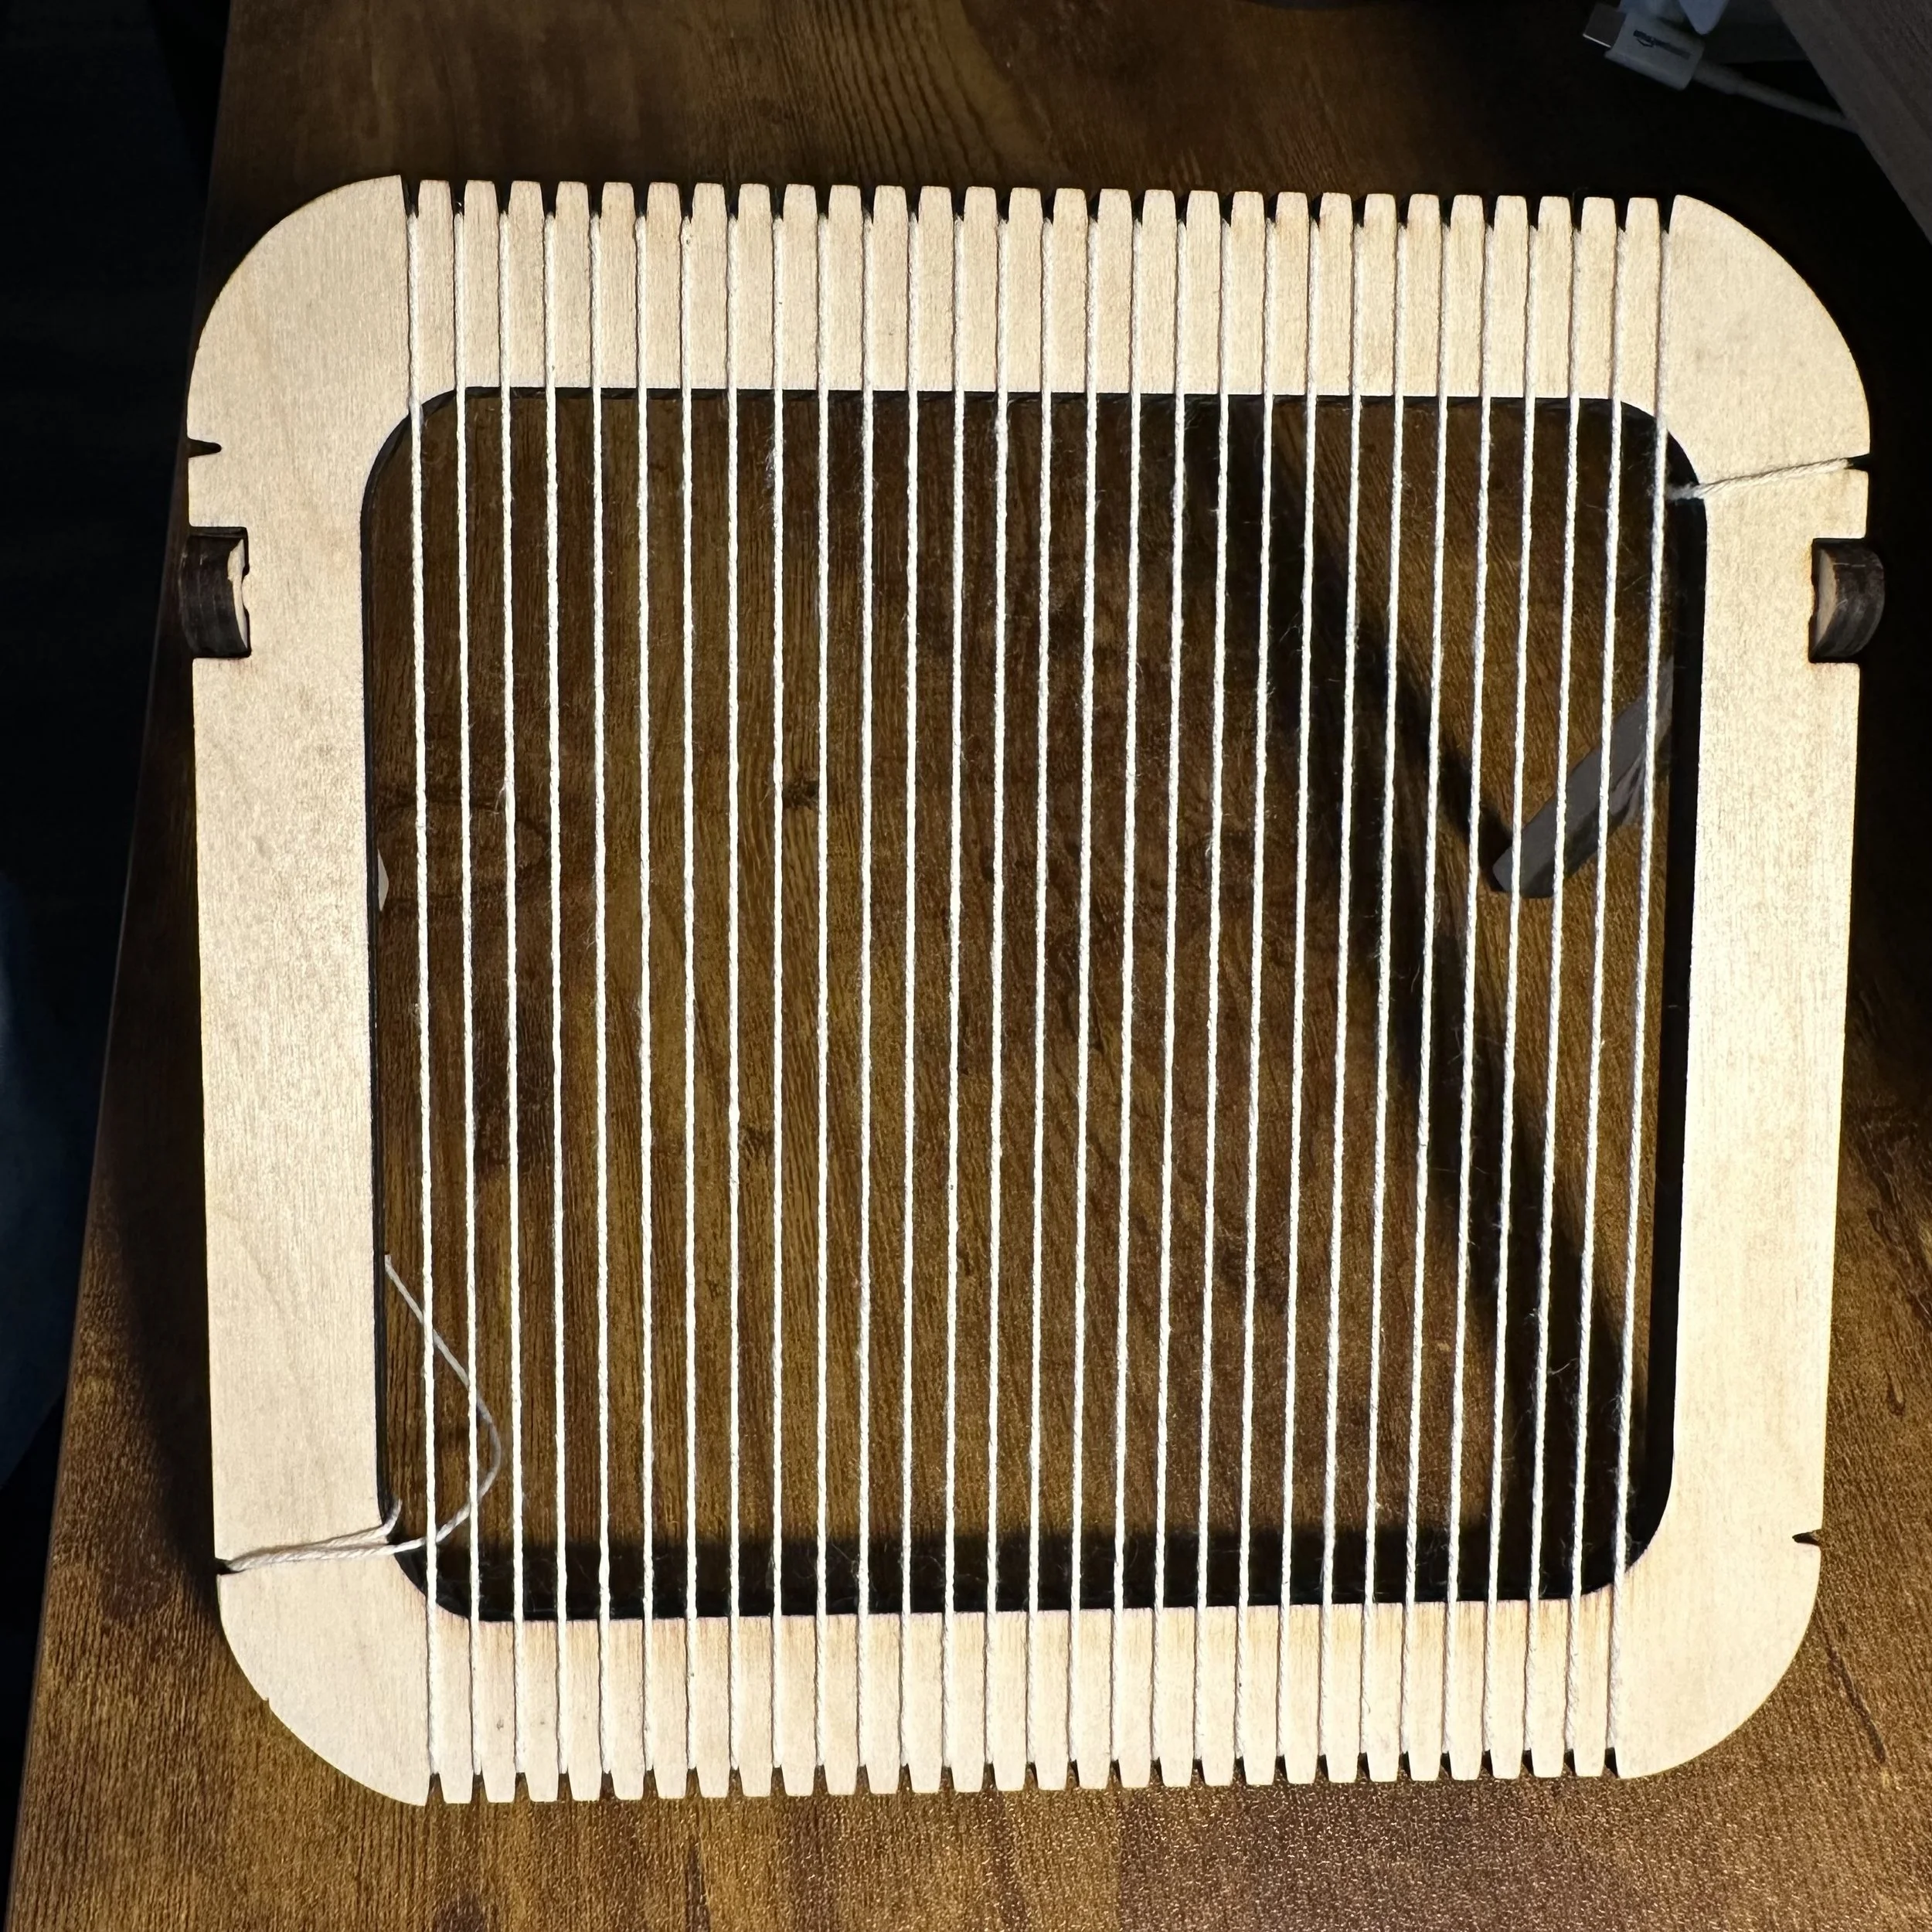
The loom fully warped, viewed from the front.
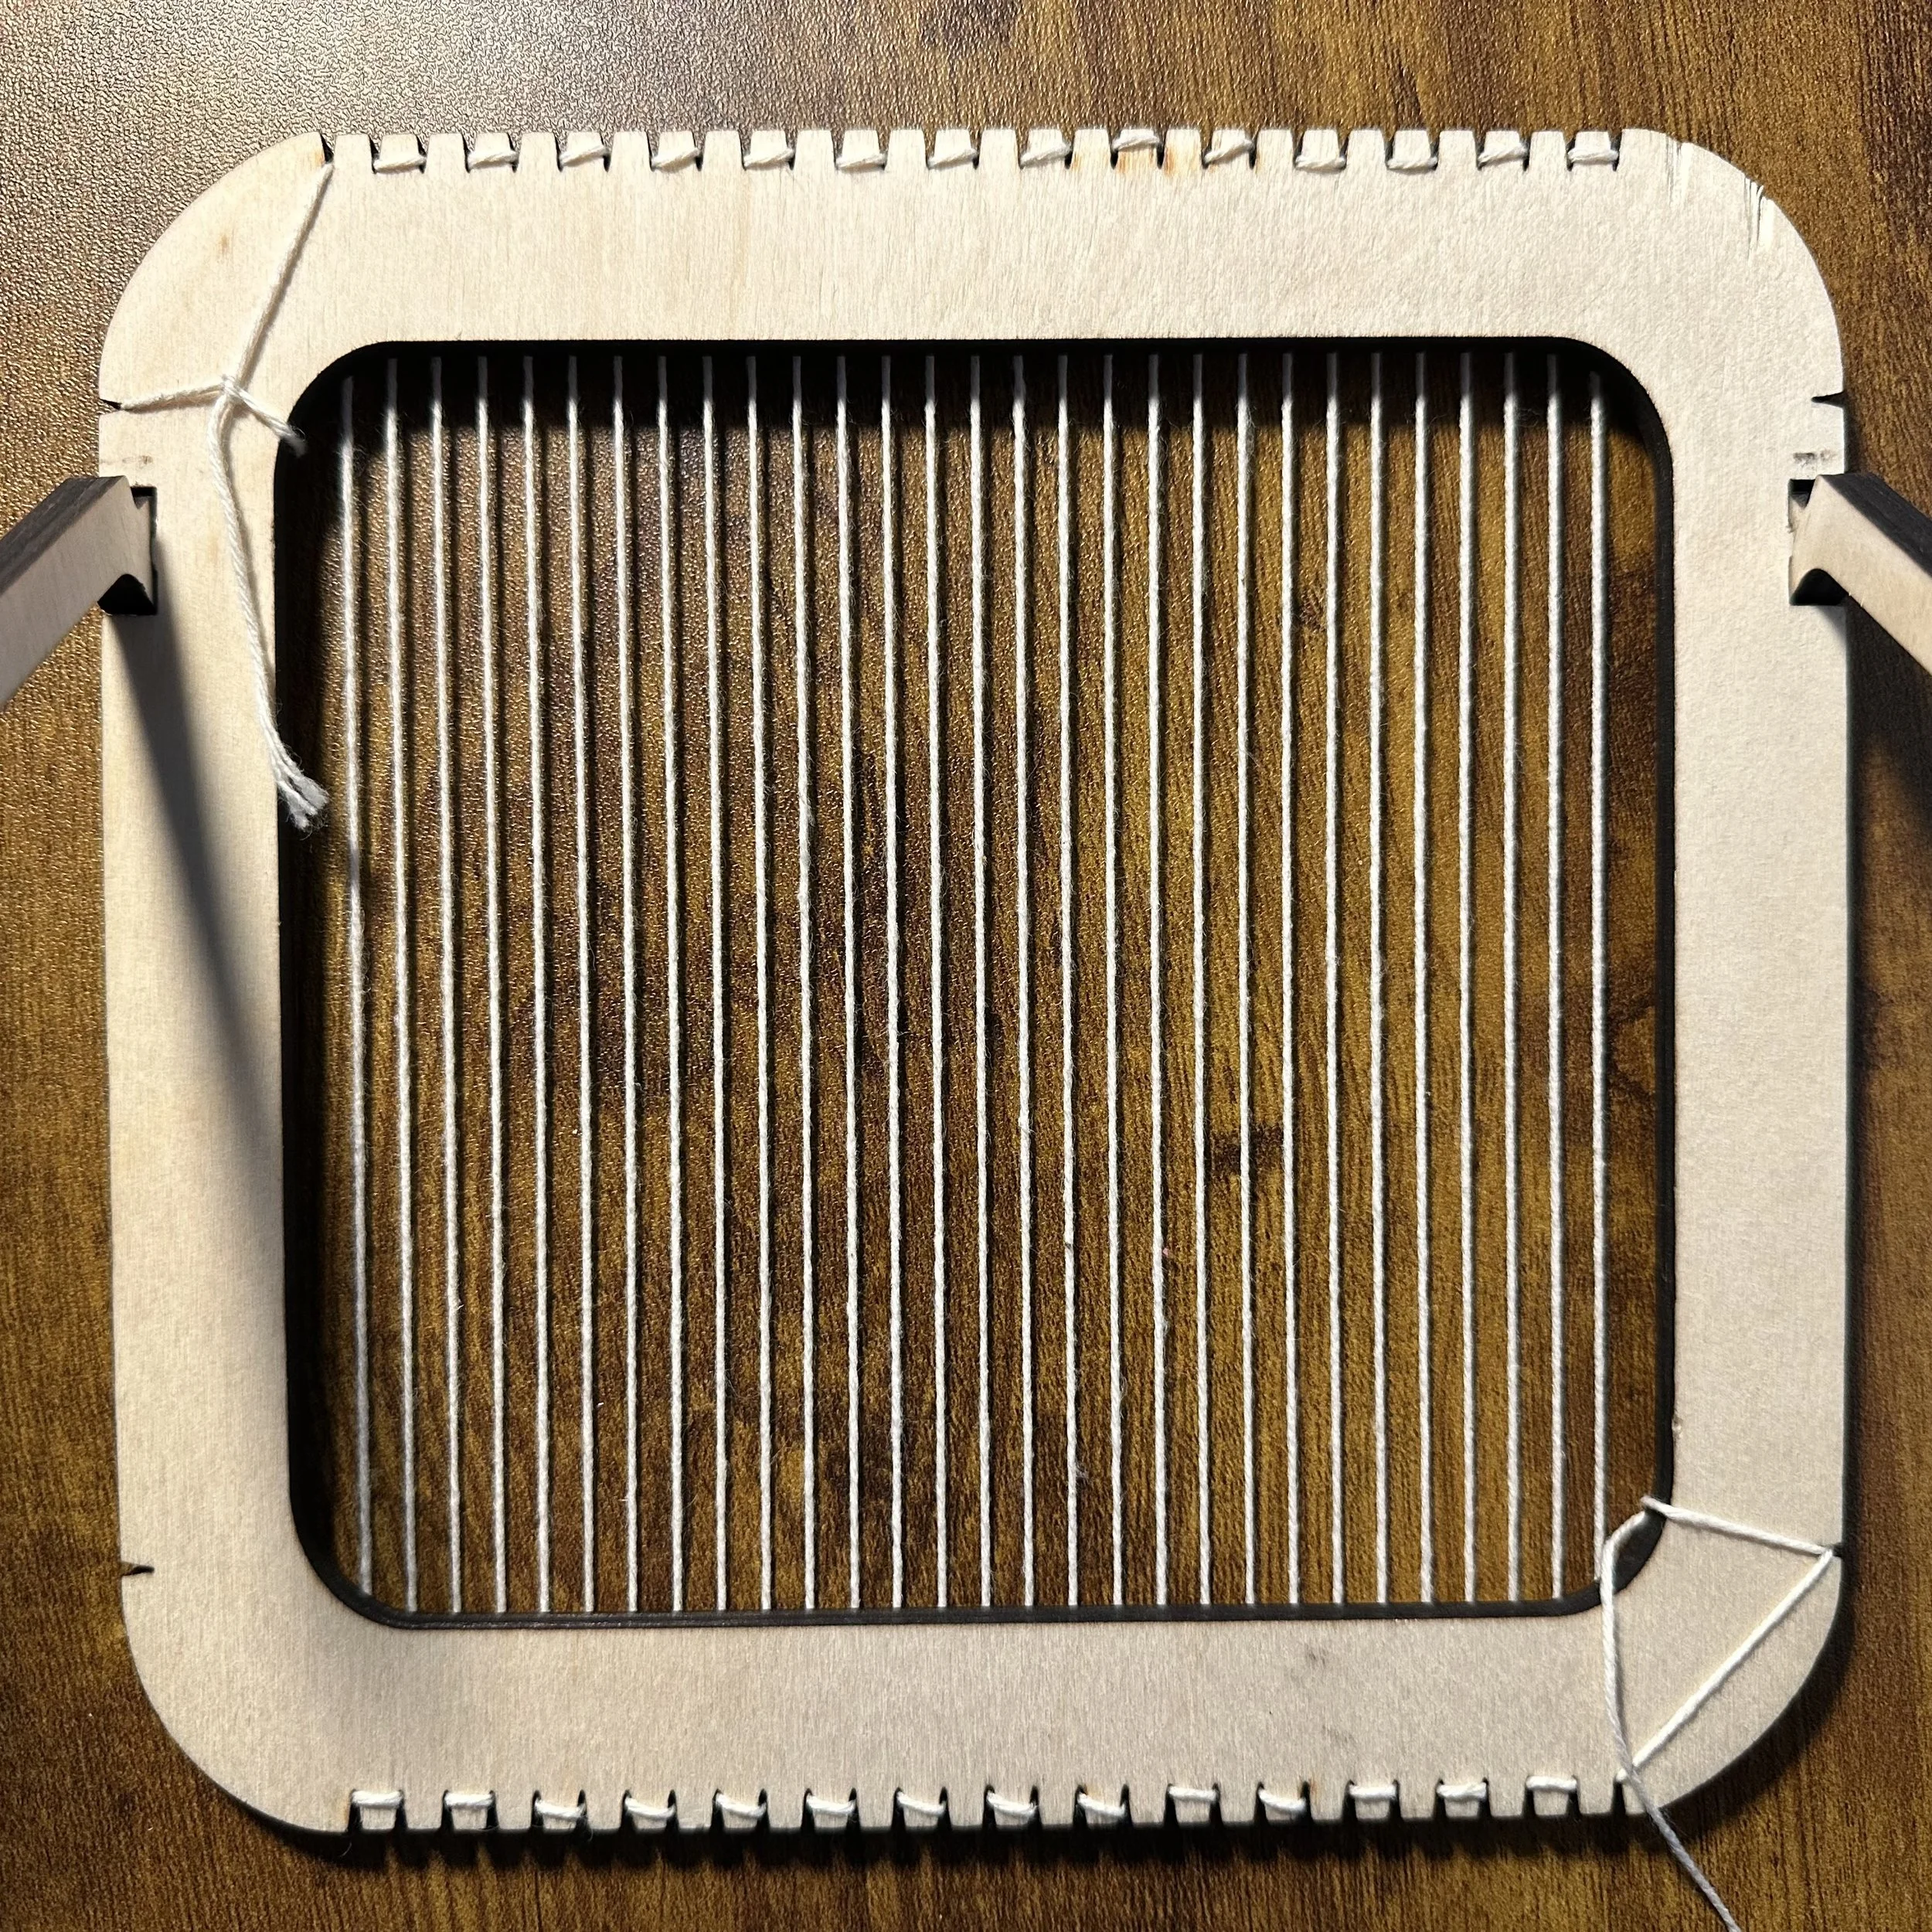
The loom fully warped, viewed from the back. This view also shows some knots, though the last knot on the bottom ended up inside the notch, so you can’t see it in this photo. It is knotted on both ends to the loom.
MAKING A WEAVING
Your warp needs to be a strong, thinner yarn, but your weft can be just about anything! Weave with textured yarns, regular yarns, thick/thin yarns. Experiment with alternative materials: flexible wire, grasses, paper strips, shoelaces, strips of plastic – lots of materials can be used as weft! The directions listed below are going to cover the basics for using yarns or other materials that are long and pliable. For certain materials, especially shorter ones, the best way to interlace them within the warp might be to just use your hands!
The best place to start weaving is with a pattern called the “plain weave”. This pattern interlaces the warp and weft in a simple over-under structure that alternates every other warp thread. The next row will be more or less the same, but you must shift the pattern so that a warp thread that is on top of the weft in the row before will now go behind the weft in the current row, and vice versa. See below:
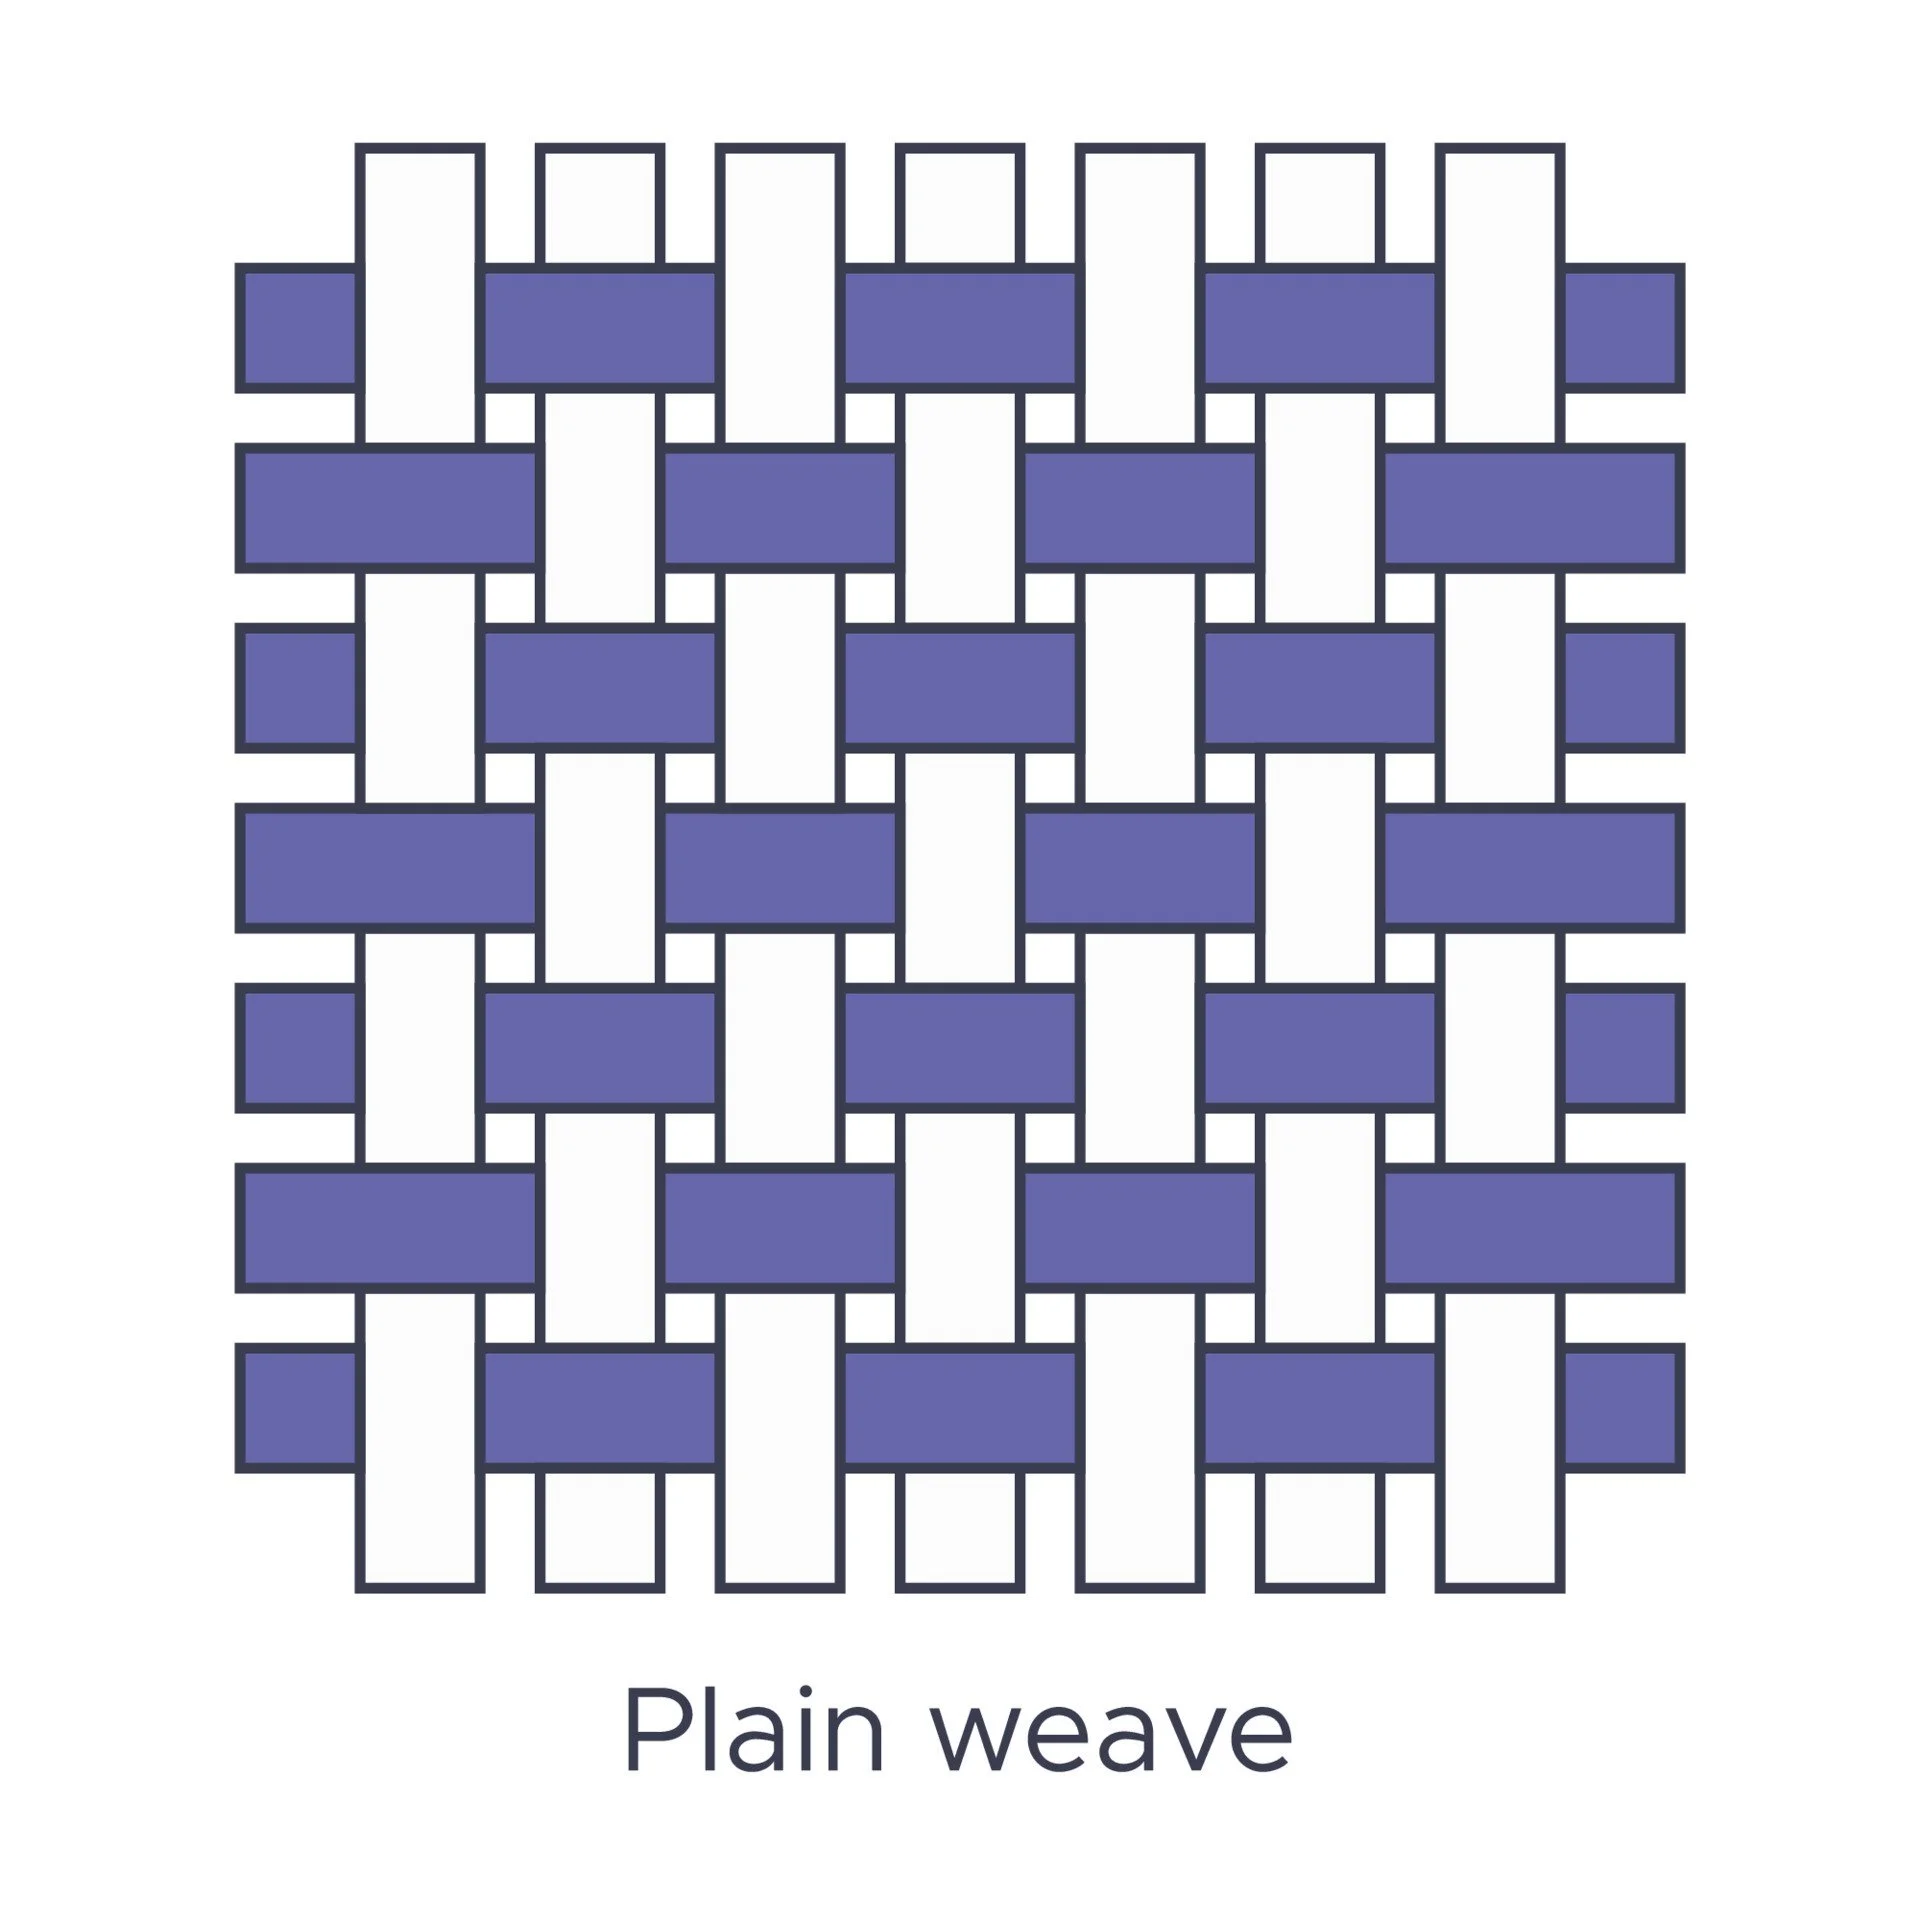
Once you get the hang of this plain weave, try some other patterns, like a twill or basket weave! Once you look up different patterns, you’ll see lots of variations of each pattern, so really there’s seemingly infinite possibilities. Plain weave is simple, uncomplicated, and absolutely fine to stick with!
When weaving on this loom, you can use tools in different ways to weave the patterns you’d like to make.
WEAVING WITH THE SHED AND SHUTTLE STICKS
Alternatively, you can use the shed stick to lift the warp threads that need to go over your weft (in the pattern you want to weave), all at once, and pass your weft through the middle of the lifted and non-lifted warps (called the “open shed”) using the shuttle stick.
Prep your shuttle stick by cutting the length of weft you would like to weave with and wrapping that yarn/material around the length of your shuttle stick, between the arms on either side. Overloading your shuttle stick can cause problems, so try it with a shorter amount if your weft is thick.
To open the shed, weave your shed stick through the warp threads in the pattern you would like to weave (see the first video below). You will weave it in flat, with the warp threads. After you’ve placed your shed stick, bring it to the opposite side of the loom from where you want your weft to go (top or bottom, typically the top)
Shift your shed stick perpendicular to the loom (As your weaving fills up the loom, you will not be able to keep it perpendicular and must hold it open partially — see the second video below). This will lift the warps away from the others and the stick basically becomes a bridge!
On your shuttle stick, unwrap enough of the warp material to be longer than the width of your weaving. Then, while the shed is open, pass the shuttle stick through the open gap between the warps on top and under the shed stick and leave the tail end of your weft in between these threads, leaving it in the weaving.
Flip the shed stick back in line with the warp threads, then remove it!
Use the reed to comb your weft thread into place.
Continue to weave your pattern with the shed stick, opening the shed, and passing your shuttle stick back and forth, changing directions for each row (repeating steps 2-6) until you are satisfied.
Because you are using tools within the warp, eventually the weaving may get too tight to use them! You can either stop weaving there or continue to fill the warp as much as possible by going back to using needles for the rest of the weaving.
Picking up the warp strings with the shed stick.
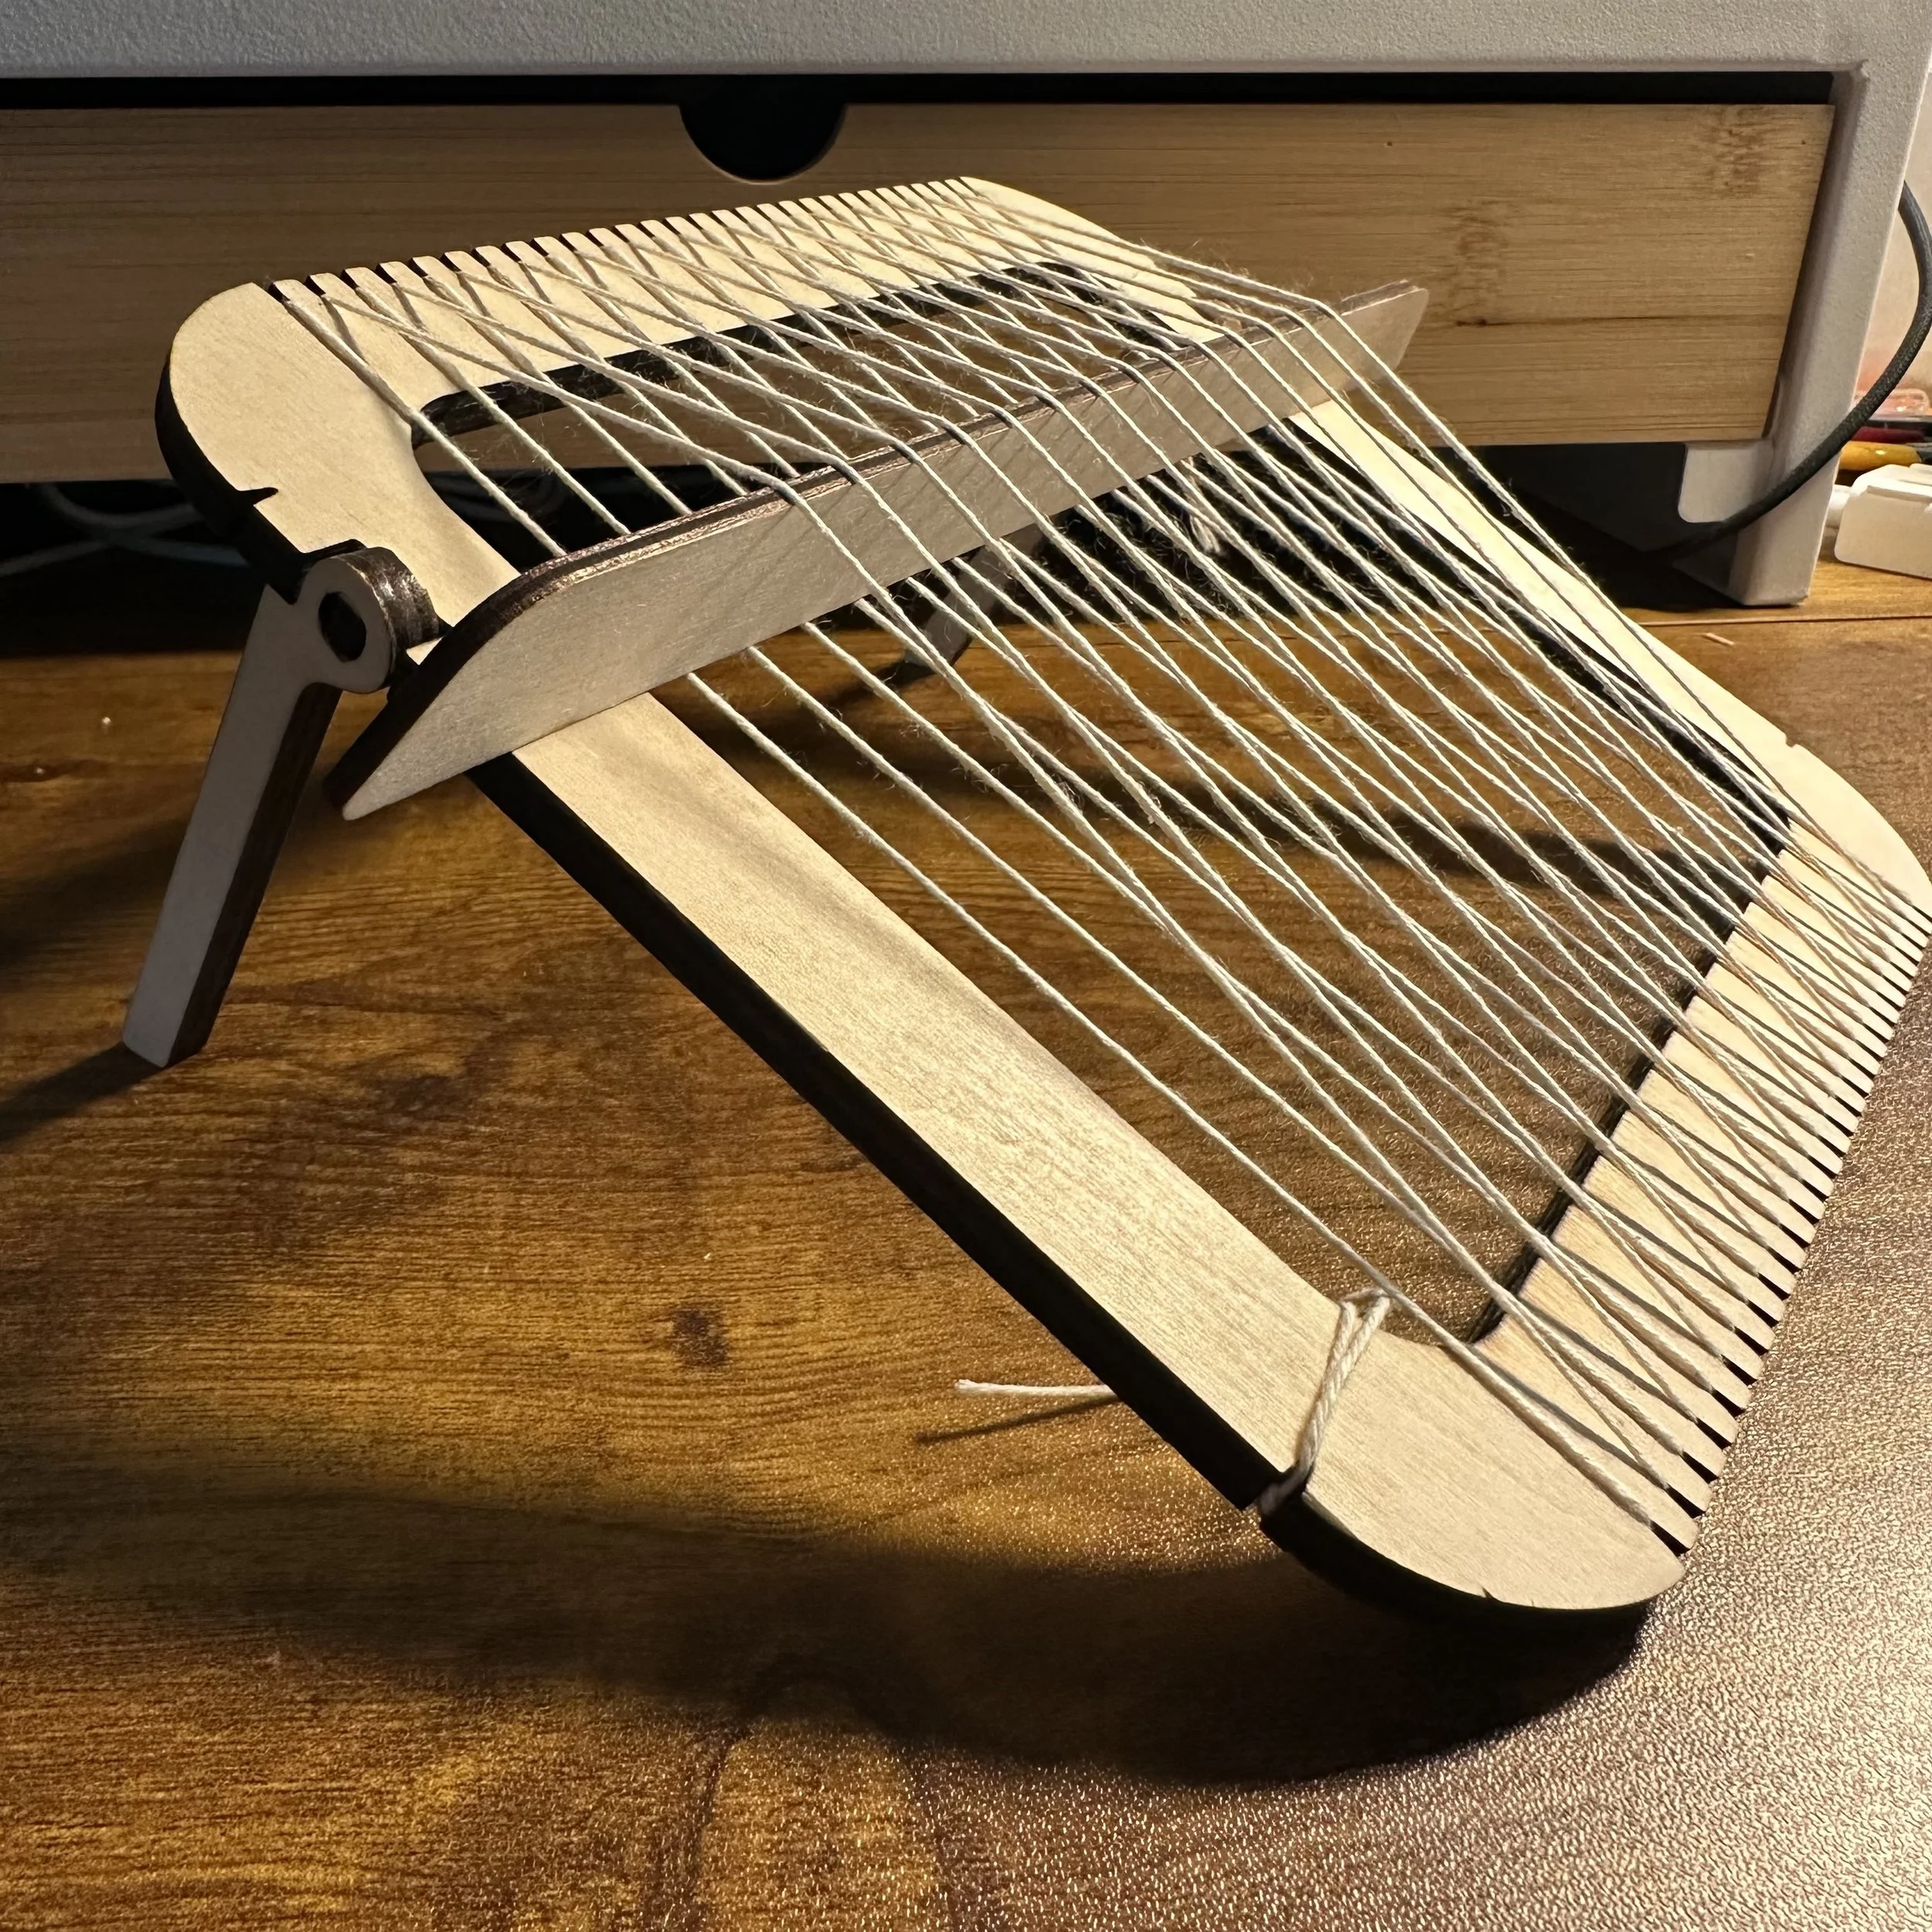
This is the open shed using the shed stick completely perpendicular to the loom. It stays in place and is under a lot of tension. Sometimes it is hard to shift it into this position, and once your loom fills up with weaving, there will be a point when it can no longer do this! Make sure not to force your warp past its strength capabilities.
Opening the shed for with the shed stick for the shuttle stick. Once the warp fills more, the shed stick will not fully open the shed. Keep using it and open the shed partially by holding onto the shed stick at an angle while passing the shuttle stick through.
USING THE NEEDLES TO WEAVE
This is a simple method, but can take a little longer.
Thread your weft yarn onto one of your needles. Optionally, tie a loose knot around the needle with the short end of your weft so it doesn’t come out while weaving.
Place your needle next to the side of your warp, and thread the needle over and under the warp threads in the pattern you want to achieve. Because the needle is not as wide as the warp, you may have to do the full warp in smaller sections to get all the way across.
Once you are threaded through the warp, pull the weft thread through the warp until the end of the weft is at the beginning of it.
To level out your weft, comb it into place with one of your reeds. The longer reed is good for full warps, while if you have shorter rows, you may choose to use a smaller reed.
Your next row will be going in the opposite direction, right next to your previous row. Don’t forget to follow with your pattern to know if you should go above or below each warp thread. Follow steps 2-4 again, alternating the direction (right-to-left / left-to-right) until you are satisfied with your weaving. You can change weft threads throughout (weave in your ends as you go or let them hang out for extra texture).
The more rows you fill your warp with, the tighter and denser your fabric will be. Experiment with fewer rows, spaced out, for a weaving that can shift around afterwards!
Using the needle to weave your weft. Don’t forget to pull the whole length of your weft through the warp so that the end out of your loom is just enough to weave back in (if you plan to do so)
TAPESTRY WEAVING
Thinking beyond horizontal stripes of singular colors
Sometimes, you may want to split up the warp with different woven sections – for example, think of color blocking; perhaps you want the left side of the weaving to be one color, and the right is woven with another. Here’s an easy way to use the needles as tapestry bobbins, so that you can work with multiple materials or multiple colors within the same row.
Thread the first weft yarn through the eye of one of your needles. Optionally, tie a loose not on the needle to keep it in place.
Then, wind your weft yarn (the long end coming from your needle) around the shaft of the needle, the long part of it, as if to wind it on a spool. Try to keep it on the wider end of the needle – it may come loose from the tapered part. Overloading this bobbin might cause problems going through the warps, so start with shorter lengths if the material is thick. Cut the weft, and leave a little unraveled to be woven in.
Repeat those two steps for your second weft yarn. (see photo below for an image of two yarns on two needles being used like bobbins.)
Now, open the shed on your loom using the shed stick in the pattern you would like to weave.
Pass your weft yarns in from opposite sides until they meet in the spot of your choosing within the weaving, leaving the tails to be woven in between the warps.
To interlock each weft yarn, pass both of them around each other like they’re linking arms.
You may need more room to do this: bring both bobbins in front of the weaving by passing them through the same gap between two lifted warp threads, wrap one around the other, and pass both of them back through the same gap again to place it back in the open shed. Each instance is shown in videos below.Before you change the pattern, unravel enough yarn for the bobbins to go back to the outside edges they came from and pass the bobbins back outside the shed. The yarns (doubling up now) should go towards each other, wrap around each other, and then back out in the SAME row. You can pull on one side or the other to adjust where they interlock. DO NOT pull so tight that the warp threads get pinched in!
Take out the shed stick, use a reed to slide the row of multiple materials into place, and repeat these steps from step 4 with the next row of your pattern.
This style of weaving is called “clasped weft” weaving. Search this term online to see many examples of it and get inspiration on how you can use it to make a variety of designs.
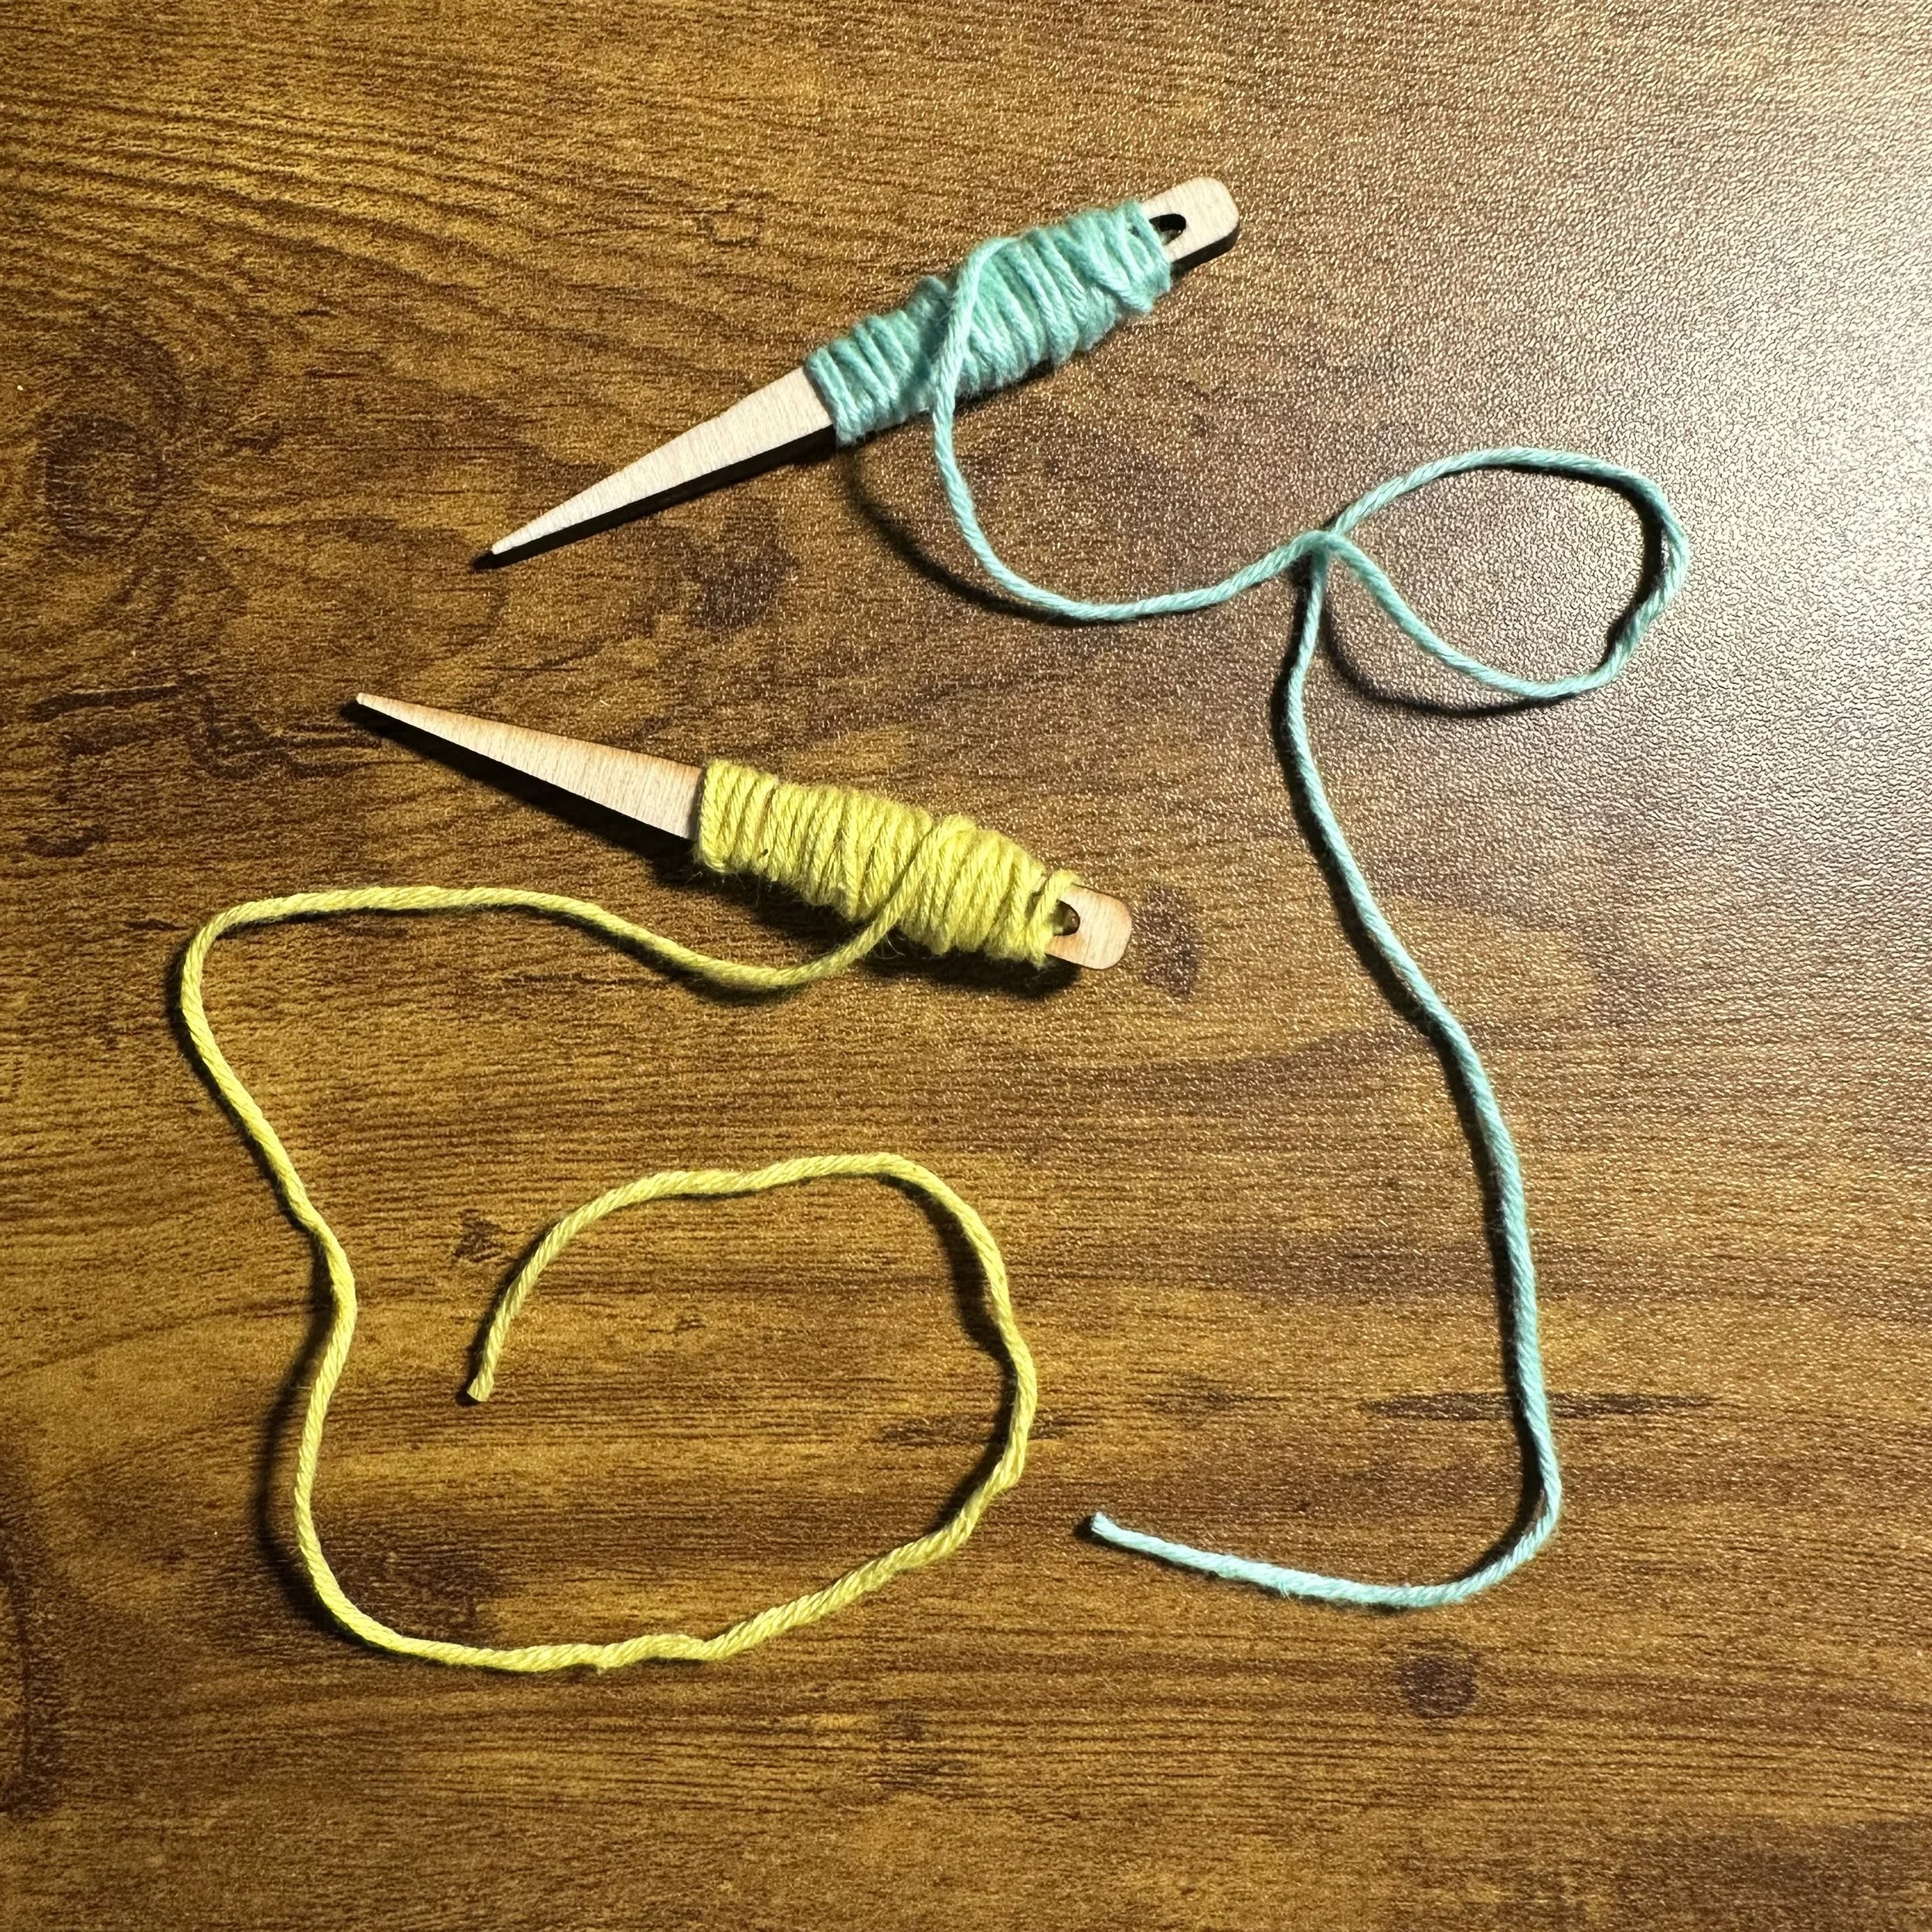
Two needles being used as bobbins, with yarn wrapped around them.
Use the bobbins to weave your wefts through the shed, wrap around in the middle and back out from the same direction they came in. This video shows the bobbins in front of the loom to allow for more working space.
Use the bobbins to weave your wefts through the shed, wrap around in the middle and back out from the same direction they came in. This video shows the bobbins wrapping around each other on the inside of the shed instead of pulling them out in the front.
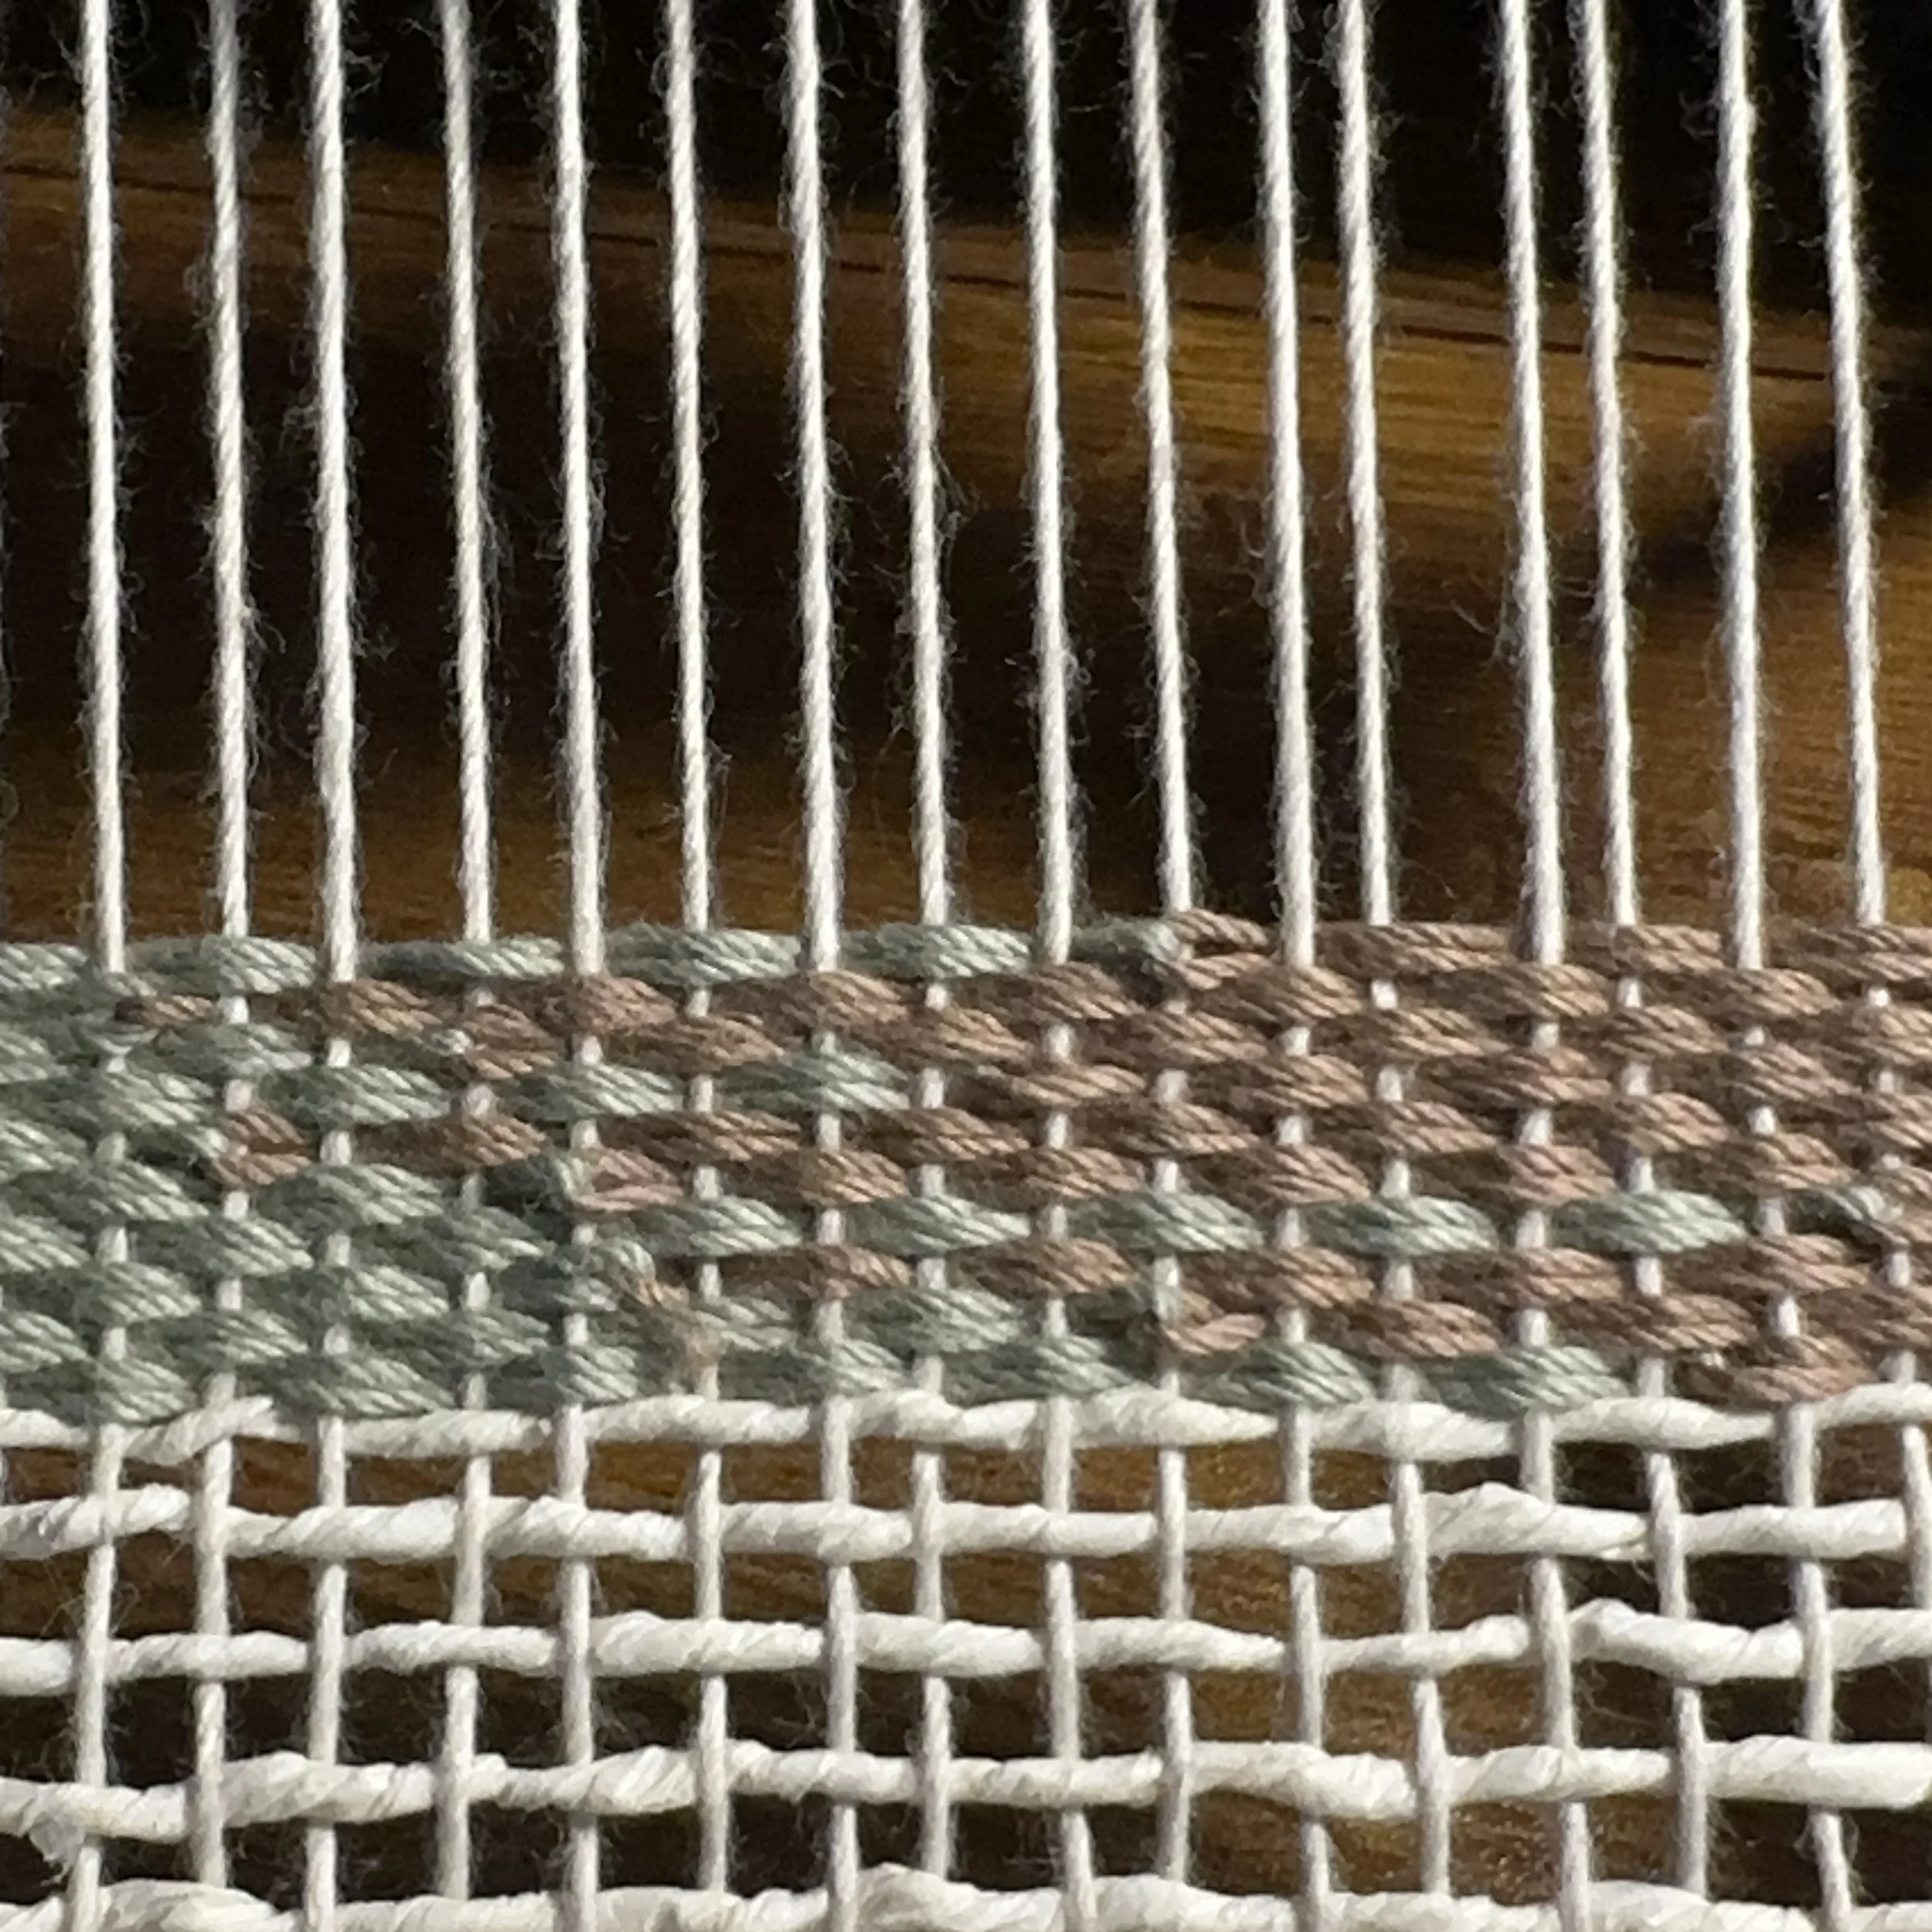
The Clasped Weft Weaving allows you to adjust how the wefts change colors in a single row. Over several rows, this could give a color-blocked look, or a blended look (above).
In the videos below, I show you how to use the shed stick and shuttle stick to create clasped weaving:
Using one of your wefts on the shuttle stick, pass the weft ALL the way through your open shed. We’ll call this Weft A.
When you have Weft A on the other side of the loom, you will wrap your other weft (Weft B) around Weft A, as if they’re linked. This is done outside the shed, not within it as mentioned above with the bobbins.
With the same shed open as in step 1, pass Weft A on the shuttle stick back through the open shed.
Pull on Weft A (linked to Weft B) through the shed as if to pull it back out.
Interlocked in the weaving, Weft A and Weft B should look like they’re going in, meeting each other, and then coming back out of the shed the same way they went in.
Adjust the strands until you are satisfied with the location where the weft appears to change color.
Comb these doubled up strands into place with your reed, making sure to adjust the sides if the warps get pulled in from adjusting the wefts.
Repeat Steps 1-7 again with the next row of your pattern. The weft colors should always stay on the side of the weaving they started out on unless you intentionally swap them.
An alternative to using the needles as bobbins for the clasped weft weaving: Wrapping the second weft around the first before sending the shuttle back to the side it started on.
Adjust the two wefts back and forth within the shed by pulling on either side. Once you’re satisfied with the split’s location, comb it into place with the reed.
You can also work with more than two wefts per row, but this can be tedious and requires more concentration. To do this, I would suggest working in a traditional tapestry style, with the needles as bobbins, and instead of the yarns clasping around each other, they will clasp around a common warp thread (the same one) before changing the pattern for the next row. If they do not wrap around a common warp thread, you will find a gap in your weaving. This can be done with all the bobbins each row, or you can follow a shape at a time with each color worked separately. However, keep in mind that it is easier to weave over another shape, than trying to fill in a spot below another shape already in the weaving, so some strategy is involved there. This is a great time to use the smaller reeds because your rows are short.
If you have a particular design/image in mind that you want to weave, a traditional method for following a drawing is to use what’s called a “cartoon” in tapestry weaving. Draw your design to scale on a piece of paper (this is the cartoon). Place the cartoon underneath the loom and warp where you want it, and then use a sharpie to mark the design’s outlines directly on the warps! Because the warp threads can twist as you weave, I recommend marking not only on the front of the warp but twist the thread as you go and mark the back of it, too.
The image below shows a more traditional tapestry style as mentioned in both paragraphs above. If you were to only work with one bobbin at a time, I would build up the brown background first, most of the way through that first shape, then fill in the blue shape. Weaving the blue shape first would then mean I would have blank space below it, since it tapers down, and it would be difficult to fully fill the weaving with the brown weft yarn afterwards. Once I got towards the top of that large shape, I would then finish off the blue weft with the top of that shape before going back to the brown background color and continuing on.
A Cartoon behind your weaving can help to picture the overall design, especially if it’s more complex.
〰️
〰️
TIPS WHILE WEAVING
KEEPING YOUR SELVEDGE EDGES STRAIGHT:
A common issue for new weavers is getting halfway through your weaving and then realizing you’re your fabric is looking more triangular than rectangular. If the sides start to bow inwards, over time this can cause problems with the warp tension, making it hard to weave. It can also be impossible to fix afterwards without undoing it row by row… or giving in to the new shape. To prevent the sides from bowing inwards, follow these tips:
Never pull on your weft to the point that it pulls the warp threads at the edge along with it! Keep an eye on the edge that’s getting wrapped around to make sure your warp is staying straight up and down.
Every time you start a new row, angle the weft at about a 30-45 degree angle before using the reed to comb it down into place, starting on the side your weft exits the shed from first. This places the weft down with enough slack leftover to adjust for how much it bends to interlace with your warps. It is physically going up and down, as well as left and right, so you actually need slightly more length to weave a row than the width of your weaving!
Alternatively, instead of an angle with a straight line, you can make a semi-circle with your weft thread, like a rainbow going from one side to the other. Then use your reed to push down from the middle and towards the outside edges.
In either of these methods (#2 and #3) you can accidentally use too much weft and there could be loops of weft where you wish there wasn’t. If this happens to you, try again but with a smaller angle, or a shorter rainbow, until you find the right balance. Too much slack can also cause issues.
To avoid over-tightening the sides of your weaving, allow for a little extra length in each weft row. This video shows a bubble or rainbow shape in the yarn getting pushed down with the reed.
WEAVING IN THE ENDS AS YOU GO
As you weave, you may want to tidy up your extra weft ends, to avoid having to go back later to do this. If this is you, here’s my suggestion:
After you place the first row of a new weft material with the reed (the shed is closed at this point), take the small tail of your weft (at the start of the row), wrap it around the selvedge edge warp thread to change directions, and weave the end alongside the pattern of the first row, or the next row, whichever is easiest for you. It only needs to be woven in for a few warp threads, up to an inch; and then it can hang loose to be cut shorter later on. (see photos below)
When you’re finished with a weft material (and used the reed to place it), cut your thread a few inches longer than the selvedge edge, wrap it around the warp thread at the end of the row, and weave it back in on the same pattern. Do this before adding the next weft thread, or at the very end of the weaving before finishing it off!
If you don’t weave in the ends while you go, you can use a yarn needle (not the wide needles that came with your laser-cut loom kit) to weave them back in after the warp is full.
If you don’t want to weave in the ends ever, don’t do it! Leave them longer and make it part of your design! The point is to have fun, and the longer ends can provide a different aesthetic with more texture, so feel free to get creative with them.
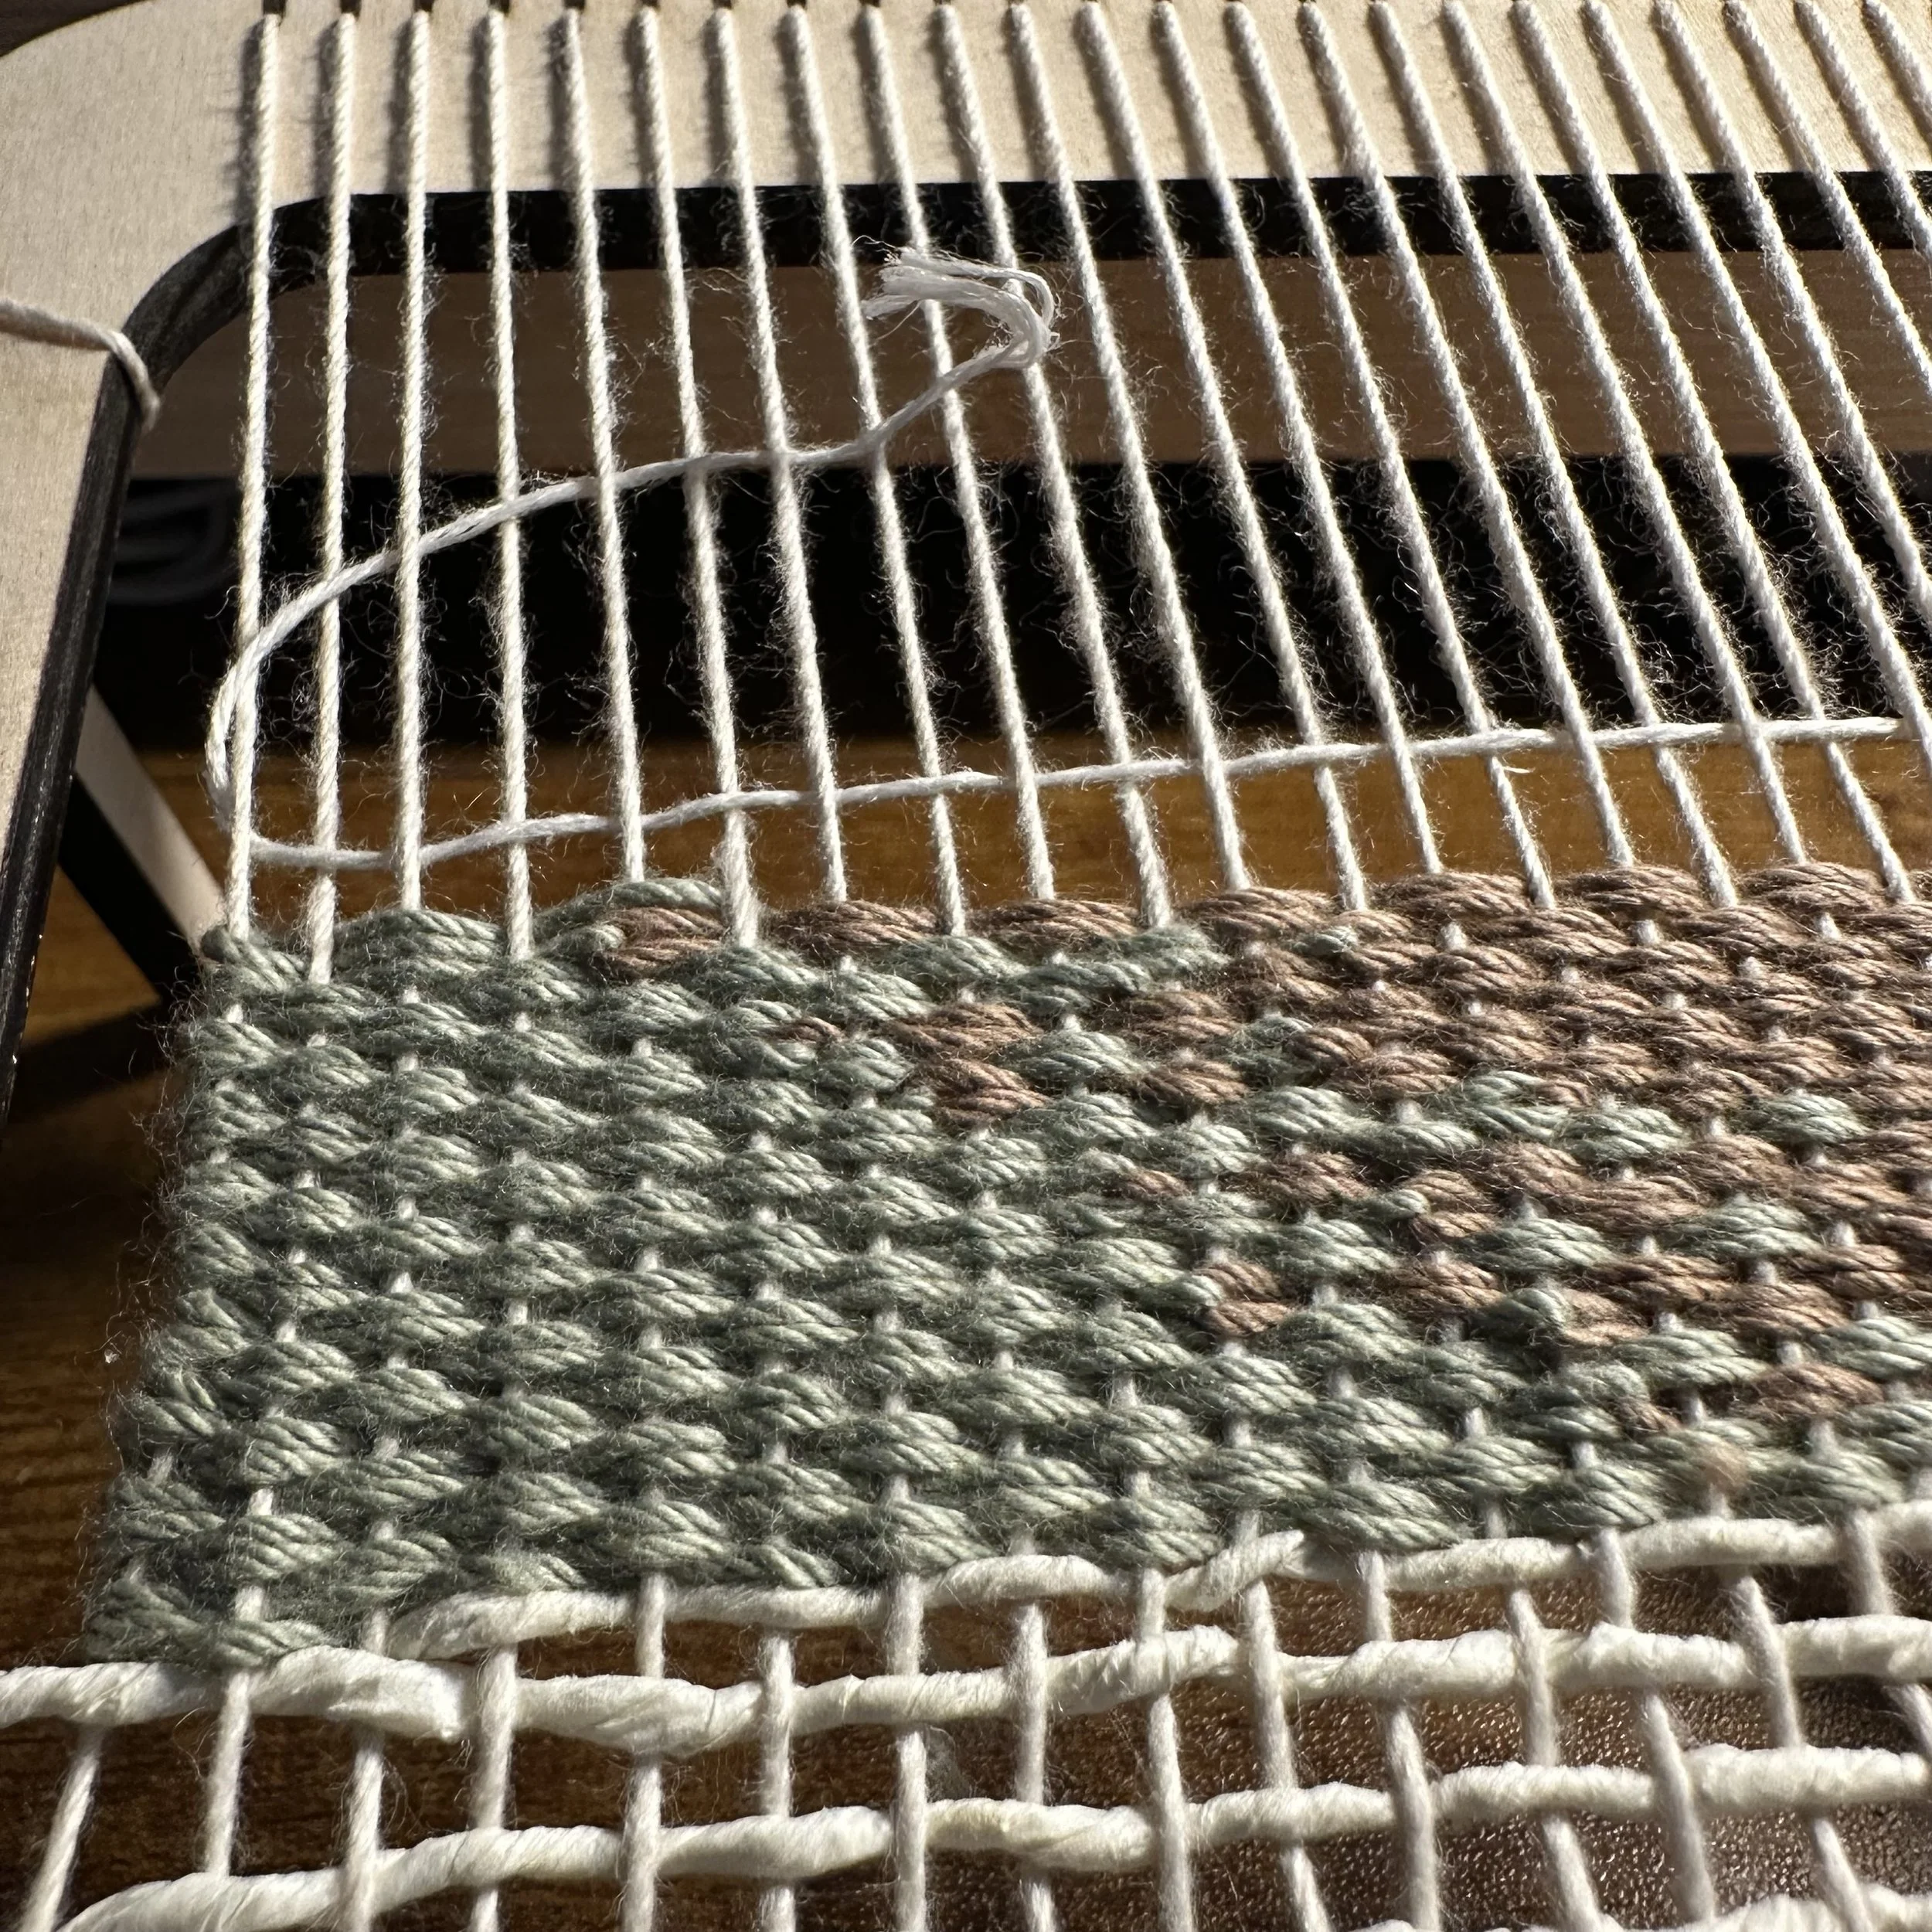
The yarn is wrapped around the warp on the edge, as if to do the next row, but is tucked into the previous row’s pattern, doubling up the yarn for a few warps.
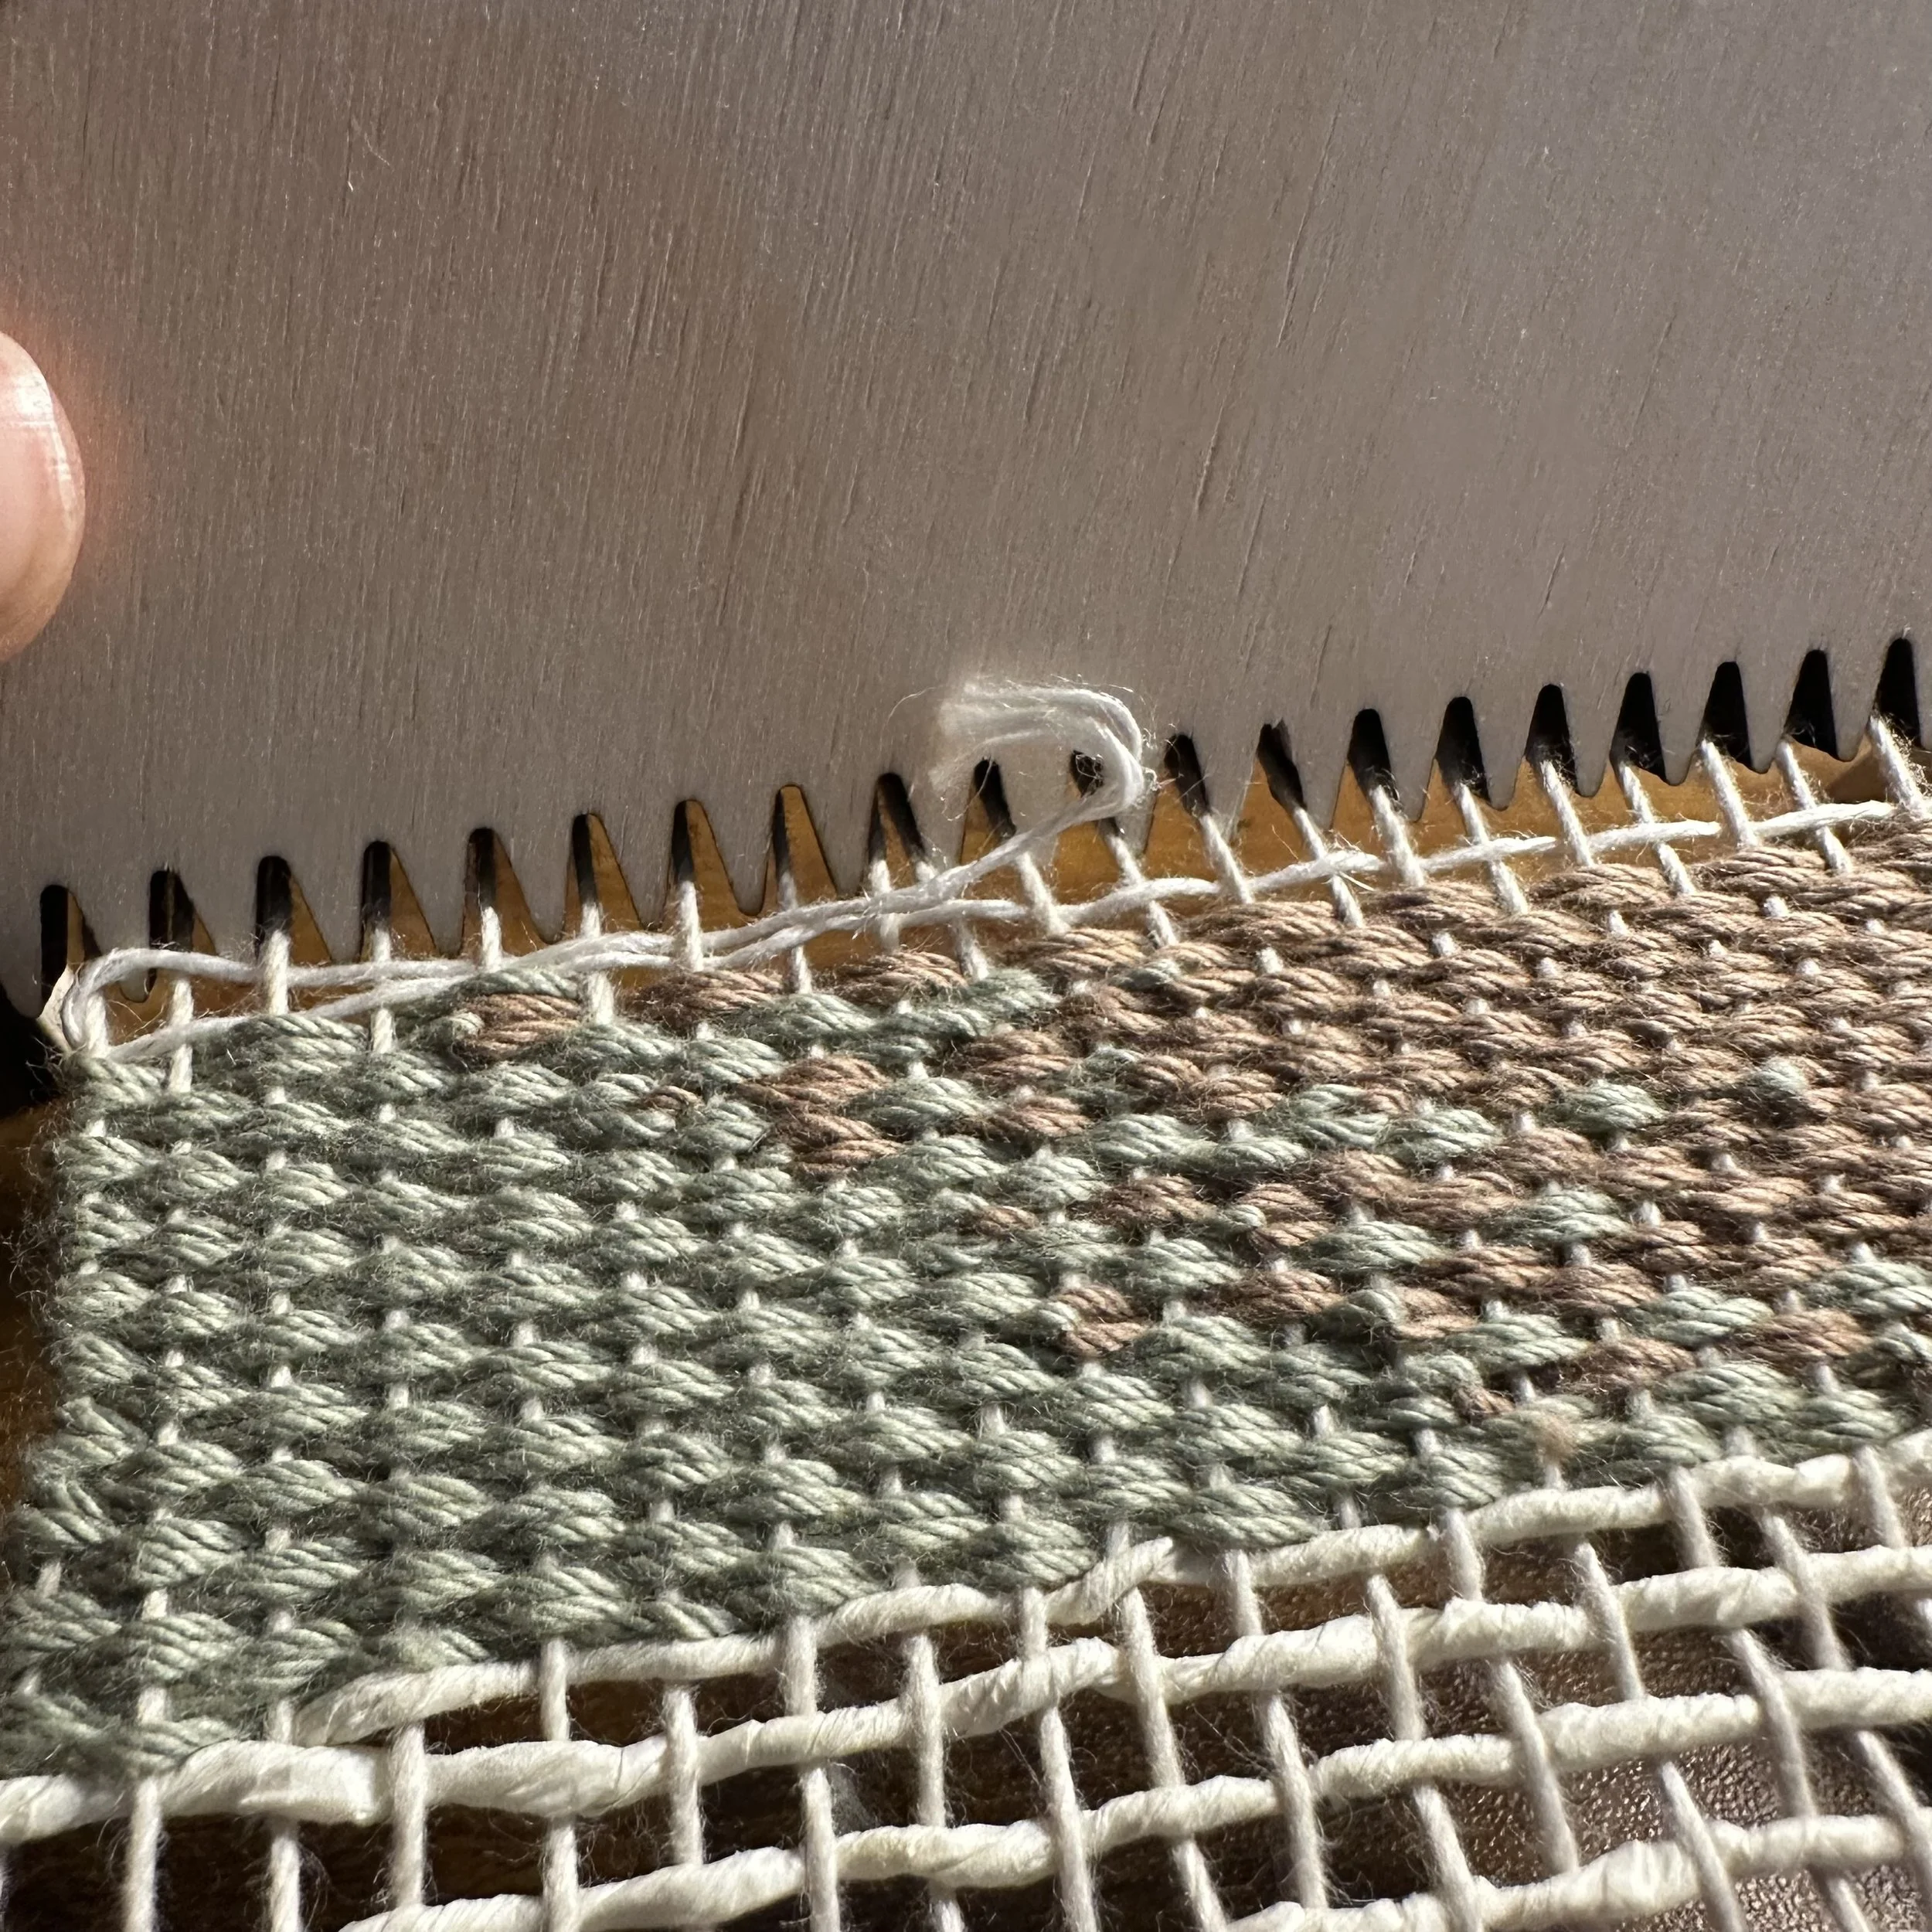
After pushing the tail into place, tuck any end on the front towards the back. After you take it off the loom, you can trim these closer to the weaving.
DESIGN EXPERIMENTATION
Here are some tips I want to share as you start to explore all that weaving can be within this format:
Your weft rows do not have to be straight! Try curving them like waves, building off each new row with new contours.
Build texture with dimensional weaving “stitches” such as: Soumak, Rya knots, Loop/“Pile” weave, and Shag! There are so many ways to add texture. One of my favorite resources for step by step instructions on these weaving structures (and more) is on The Weaving Loom website, made by a tapestry weaver named Kate, who is based in Chicago:
https://www.theweavingloom.com/weaving-techniques/Give your weavings enhanced interest by adding a variety of textures and values. Think about how colors work together, too.
FINISHING YOUR WEAVINGS
Possibly the most intimidating part of the whole process is figuring out how to take your weaving off the loom and how to display it! Here’s some simple ways to move towards the finish line:
You can now snip the warp thread that is tied to the side of the loom, leaving enough length to weave in. Taking the rest of the warp off the loom is as simple as flipping it over and pushing the loops off the pegs/bumps. Once one side is off, the other comes off without too much effort. (See the first video below)
If you have filled your weaving as far as it can go, you may have very little left of the warp on that side of the weaving. I recommend just adjusting the weft rows to fill in the gaps. It looks clean and as long as the weft is contained within the warps, each warp strand will wrap around the edge and look a bit like it’s stitched. (See the second video below)
If your warp loops are VERY small: consider getting a dowel rod the width of your weaving to hang it from. Twist each of the loops once, and thread the dowel through each twisted warp. The dowel size (width/circumference) should be smaller than the length of your warp loops. Weavings can shift, though, so this is a flexible suggestion.
If your warp loops are somewhat small: you can also consider tying the loops into small overhand knots, butting up against the edge of the weaving. Then, using either a crochet hook if you have one, or another small hook that won’t catch too badly, place the hook through the weft on the backside of the weaving near the loop, grab it, and pull the loop through, weaving it into the backside of the fabric. (This is also shown in the second half of the second video below.)
If your warp loops are loose enough, you can do much more:
Cut the loops at the end, and tie them together, making sure that the last row of weft has been fully secured (tying two warps that are both on the front/back side of the fabric doesn’t really help in this kind of instance.) and weave in the ends on the back like mentioned above.
Gather a small grouping of the warps together and tie in an overhand knot to create tassels. These warp tassels could be a part of the design. The tassels can also be twisted or braided to make a fringe that is decorative.
The larger loops can be used to wrap from front to back around a dowel rod (or even a branch or driftwood!). Lay your weaving face down, and the dowel rod on top of the warp loops next to the weft. Bring each loop over the dowel and weave into the backside of the loom in the weft, pulling it through a couple of rows. You can do this with a yarn needle or a crochet hook. Once all the loops are woven through the backside of your weaving, tie a loop to the next one in a knot so they cannot slip back out. If there’s an odd number of loops, group a couple together at the end to secure every warp thread.
Get creative with your finishing style to make your weaving extra special!
Taking the loops off the back of the loom. This will be the same method for any weaving, even if the loops are long. Once one side is off the loom, the other side can be easily slid off .
For extremely short warp loops (you filled the loom up extra tight to the top or bottom), it’s best to just shift your weft a little to fill in the warp gaps evenly. It create a really clean edge. This video also shows how to tuck in loose threads with a crochet hook.
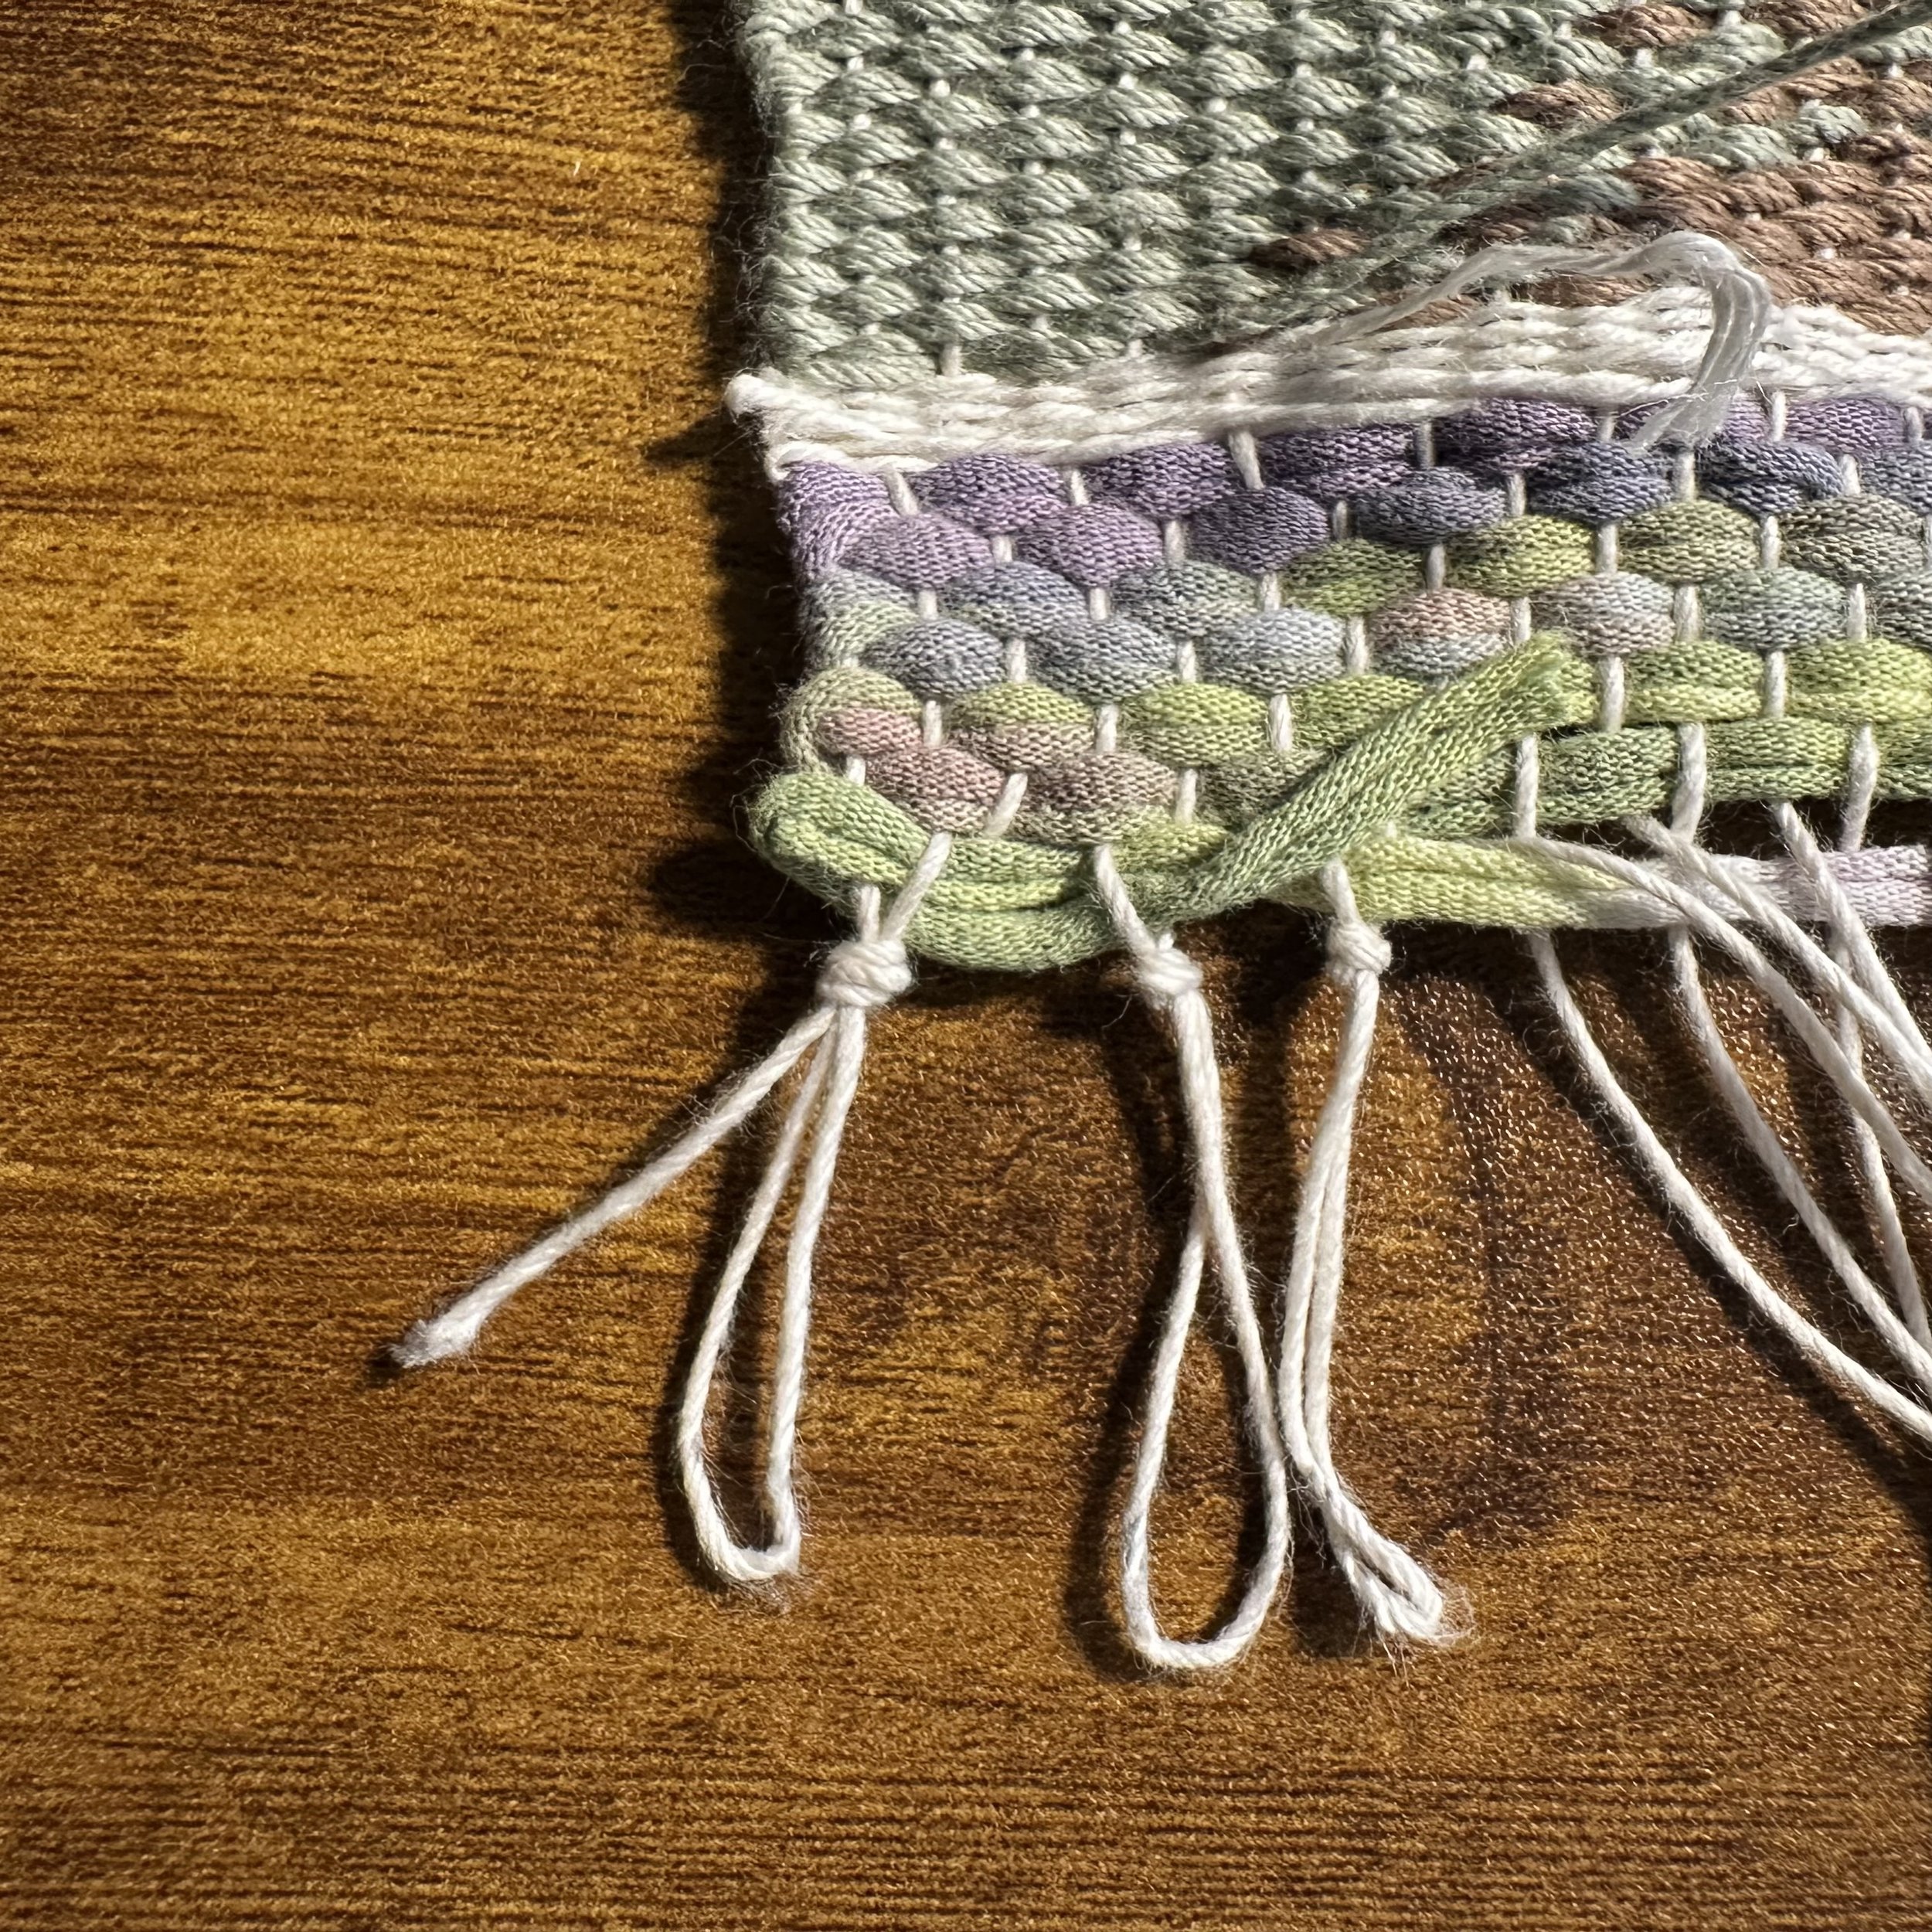
Using longer warp loops to tie overhand knots near the edge. These will secure the weft before using the loops or cutting the loops.
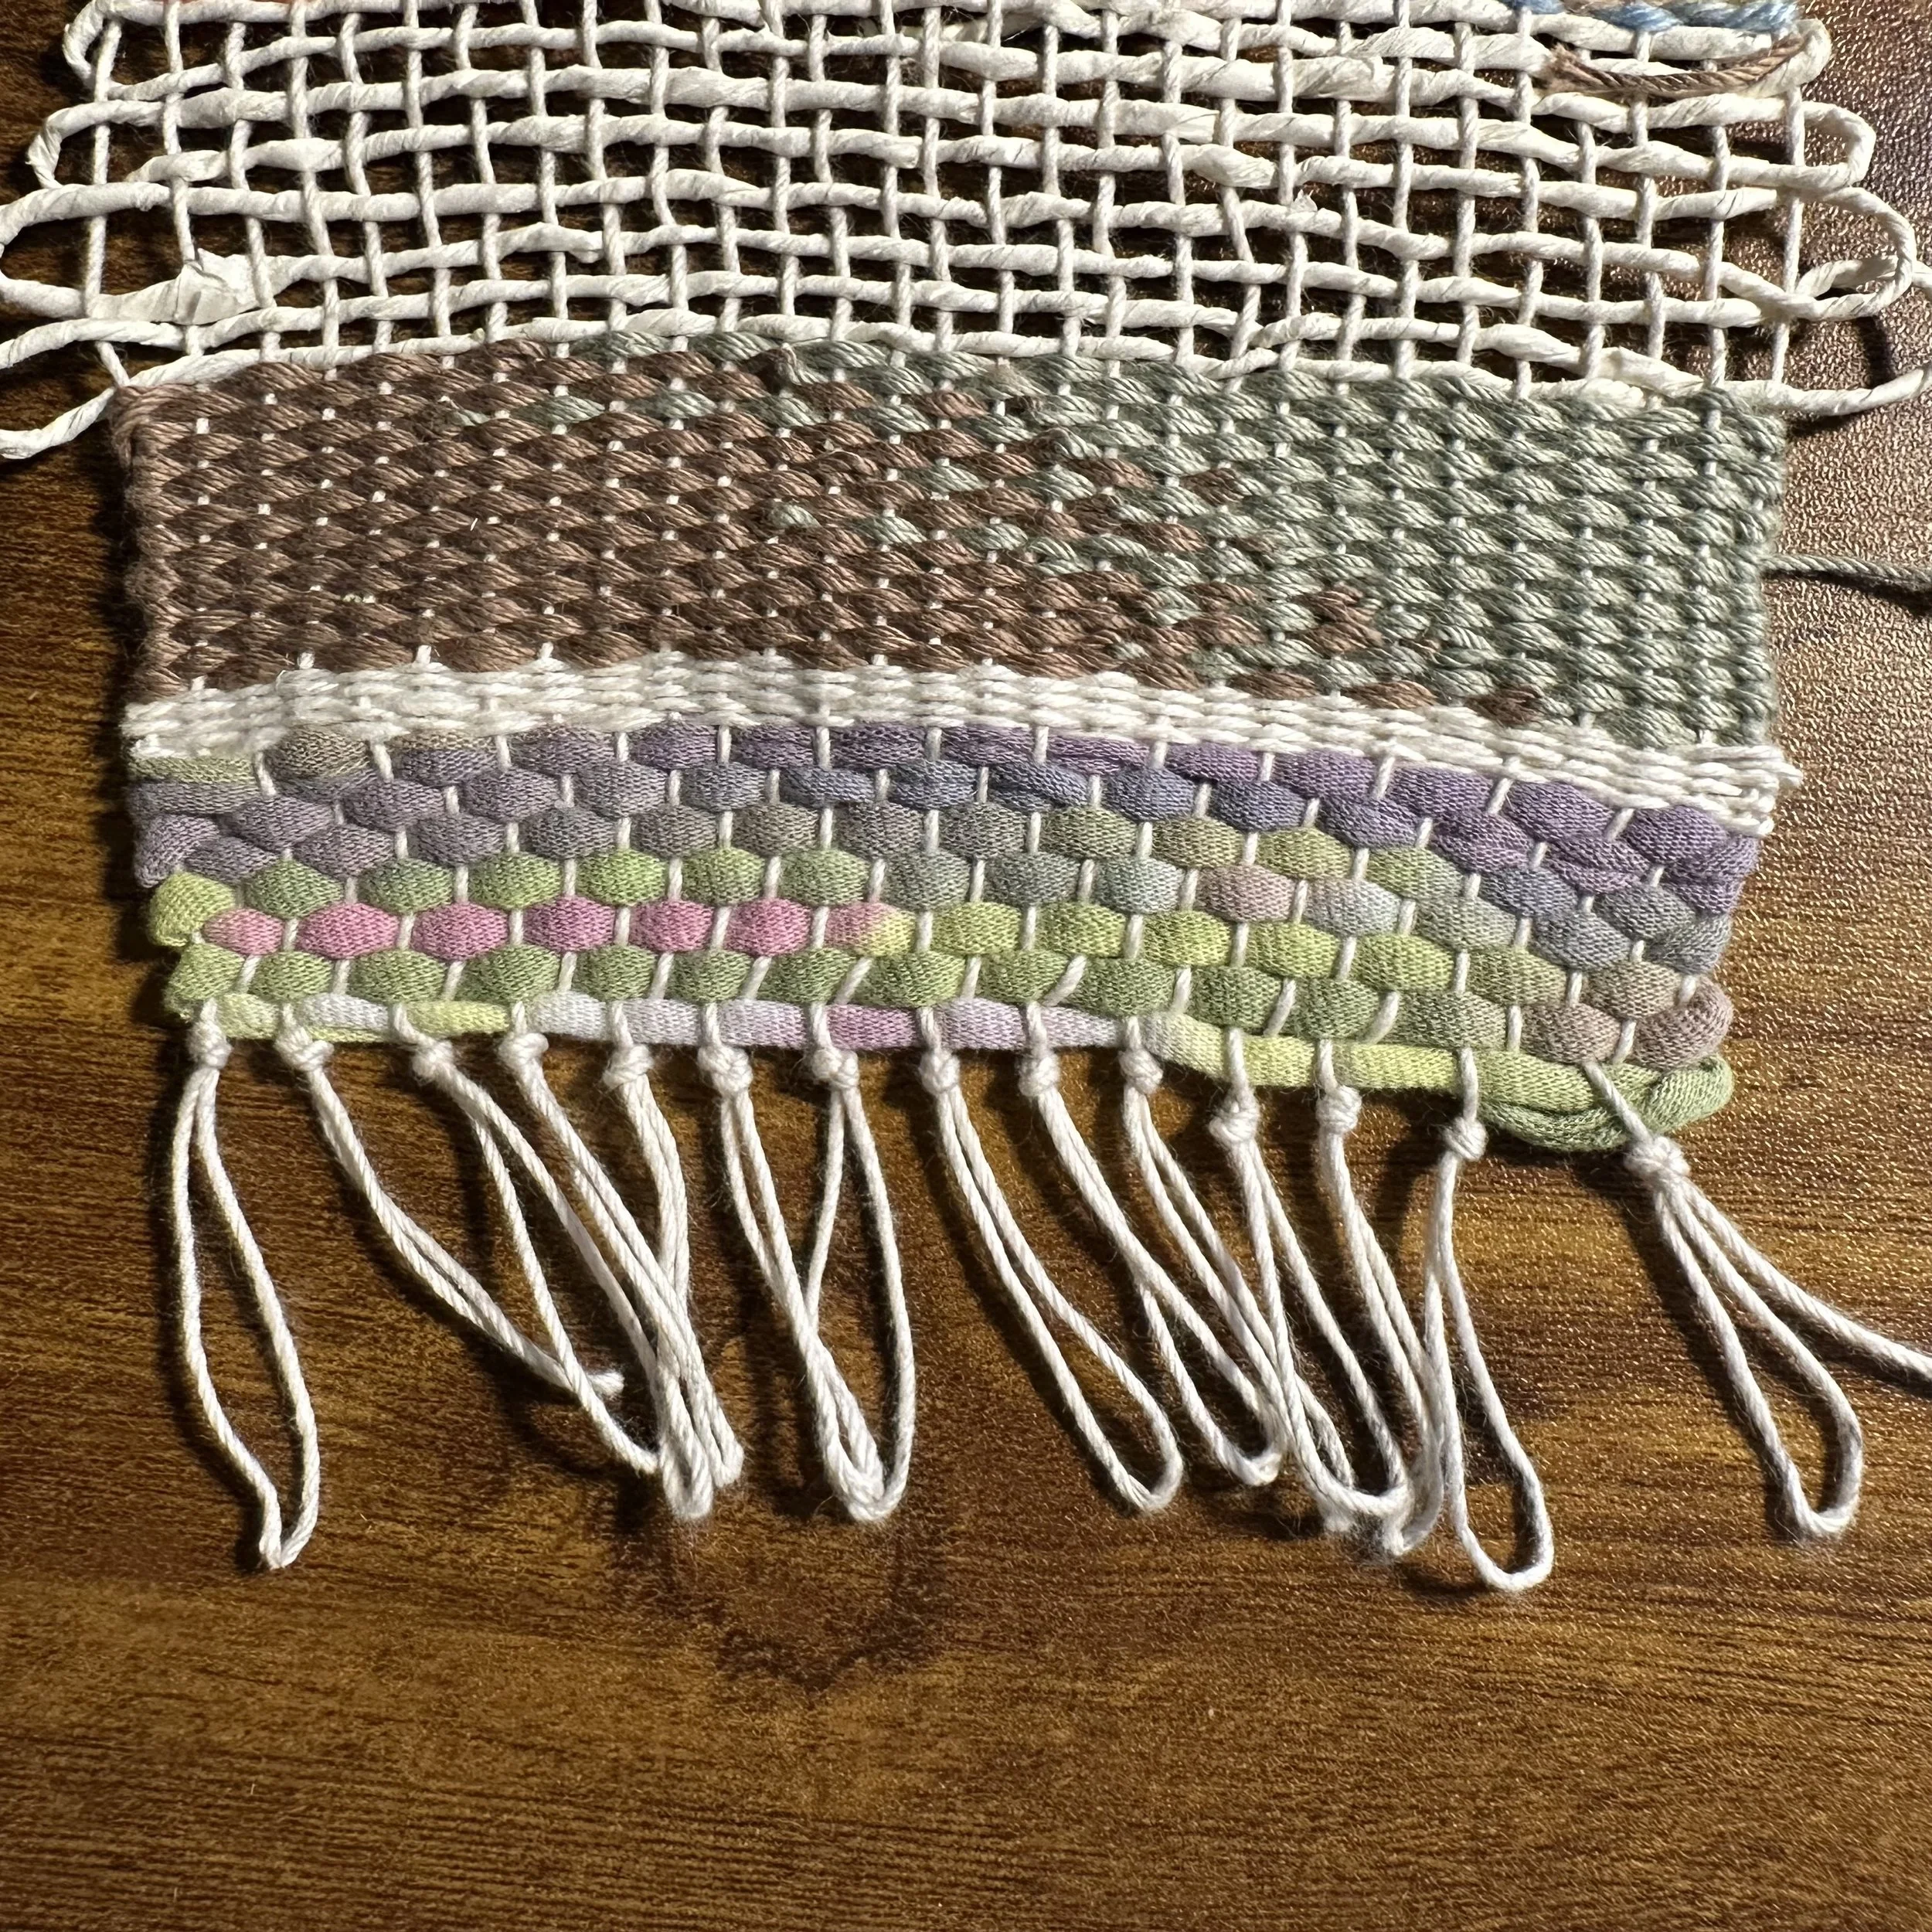
Using longer warp loops to tie overhand knots near the edge. These will secure the weft before using the loops or cutting the loops. This is the view from the front side.
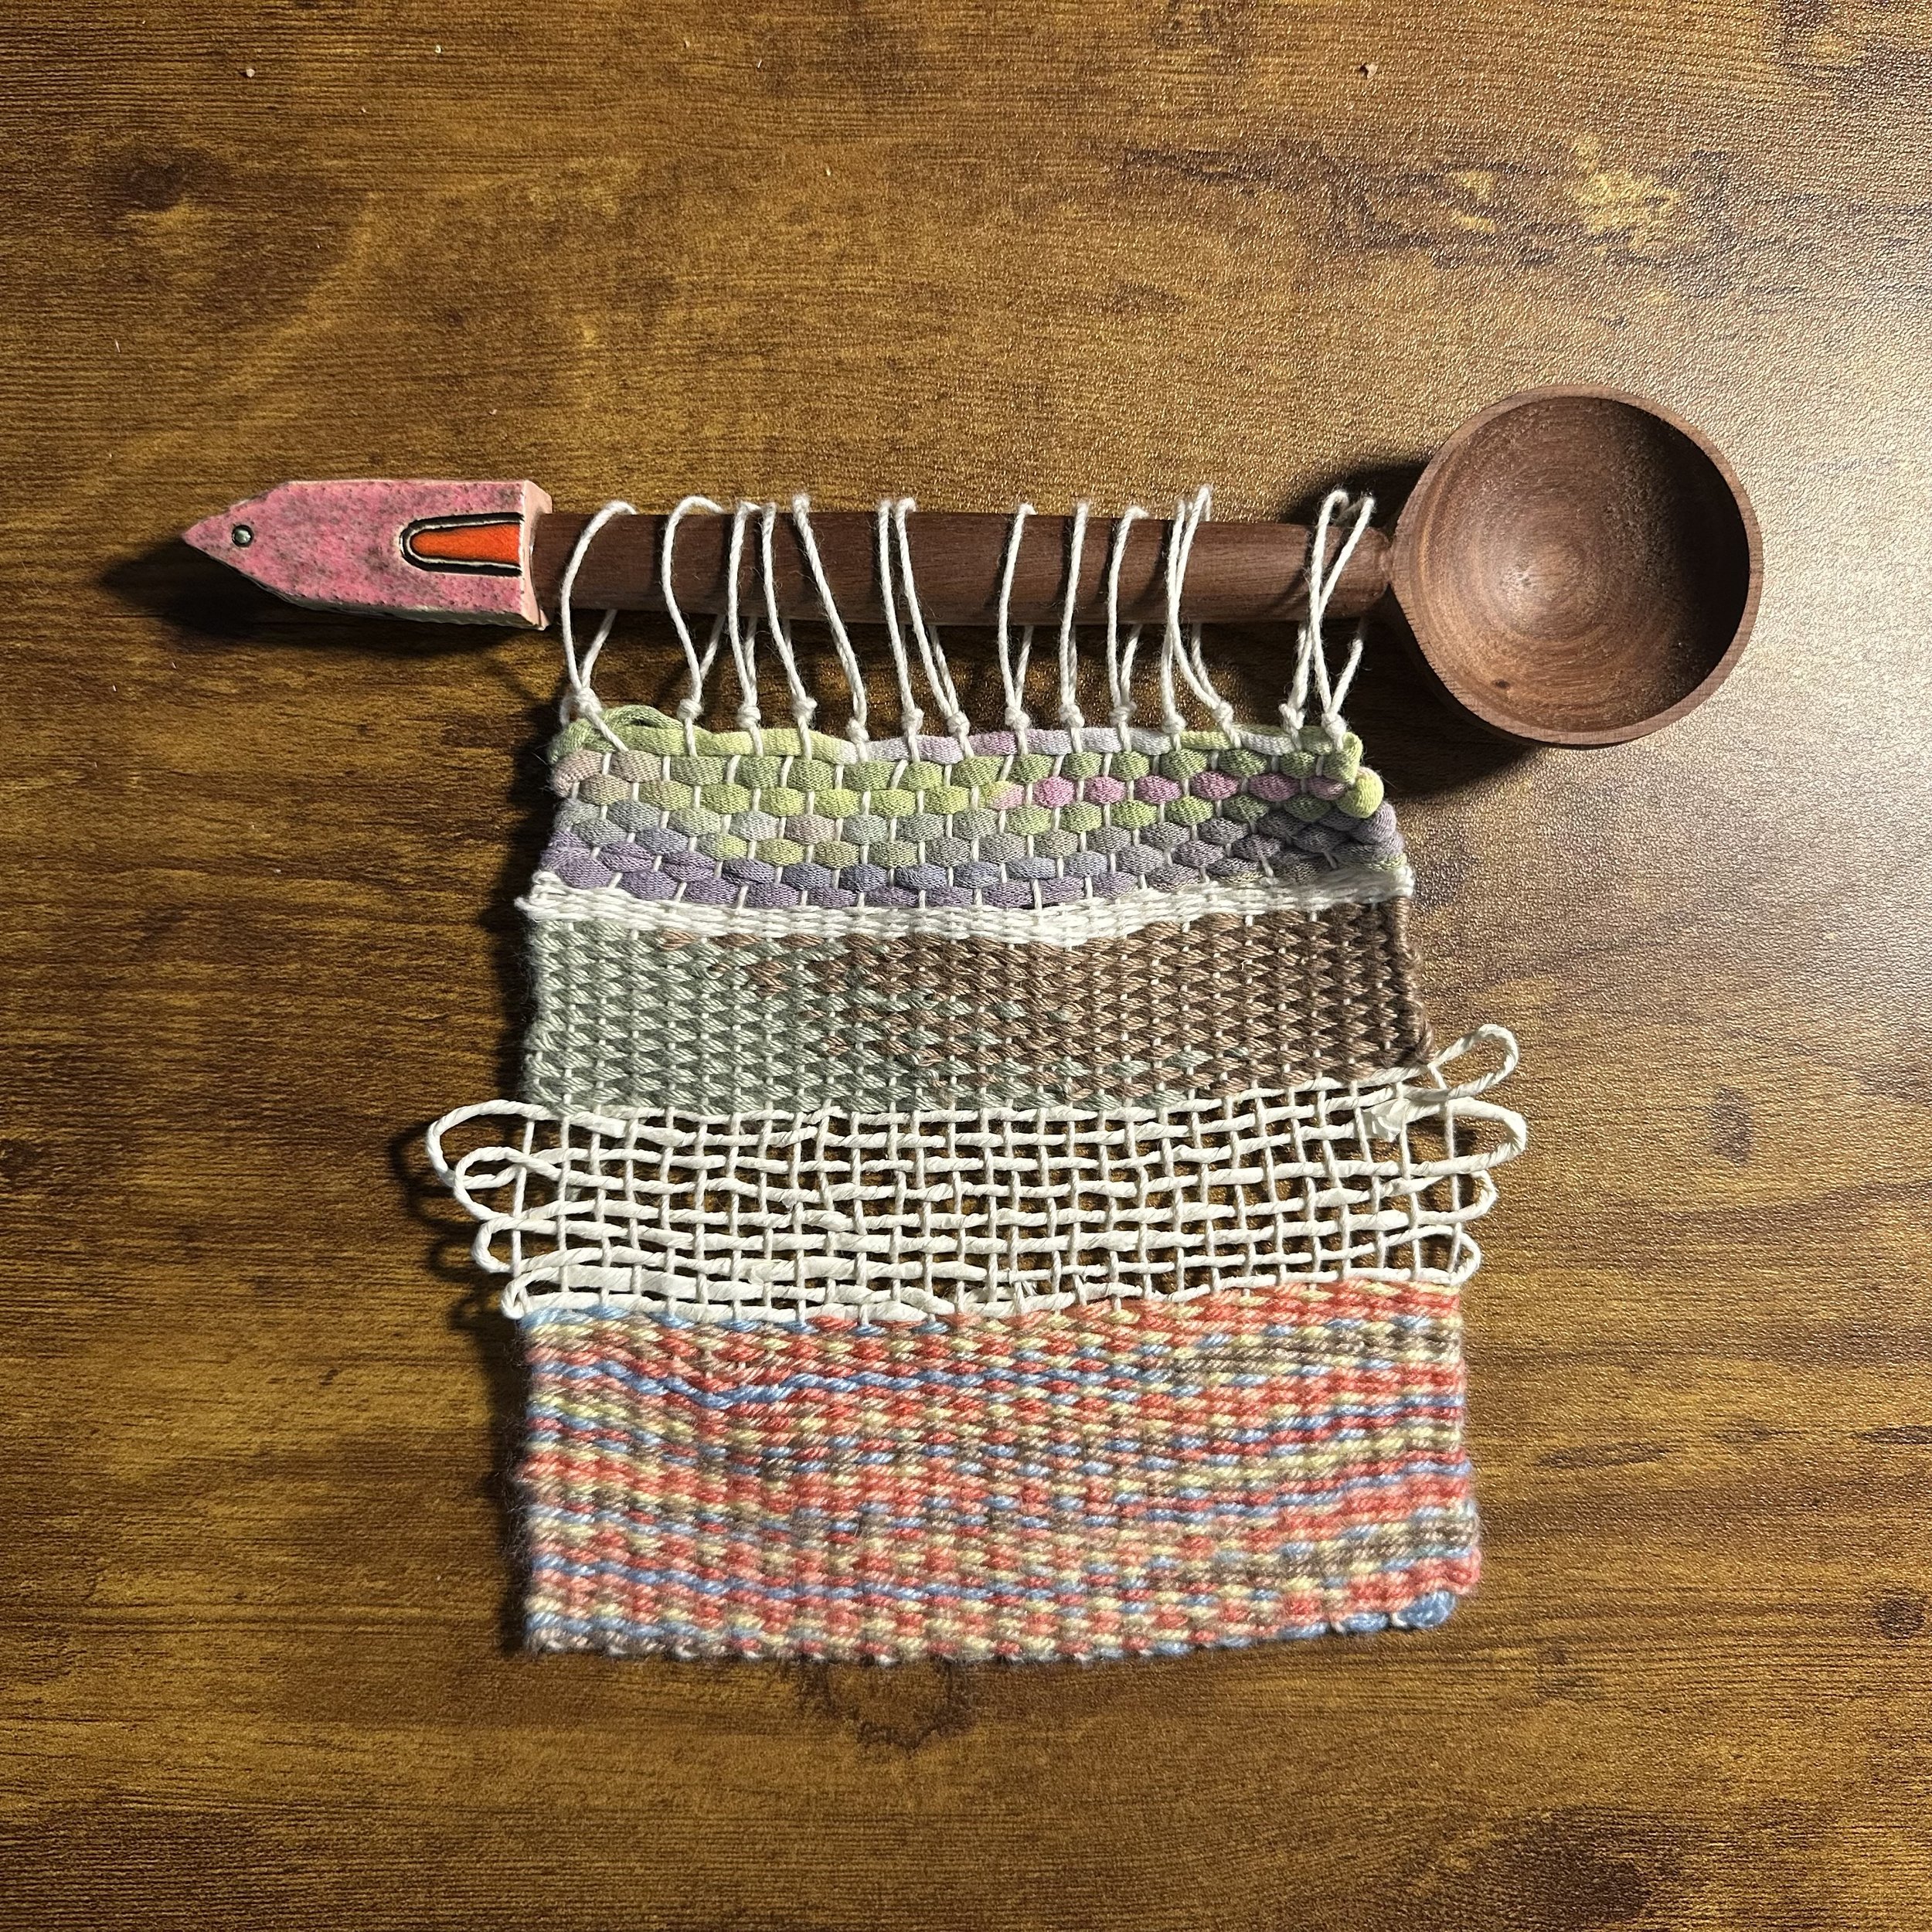
You can wrap the loops left over around a dowel rod or other object (seen here with a handmade spoon with a ceramic house on the end, made by Turkish artisans — Victoria and Volkan Baba, of MURAVA Ceramics.
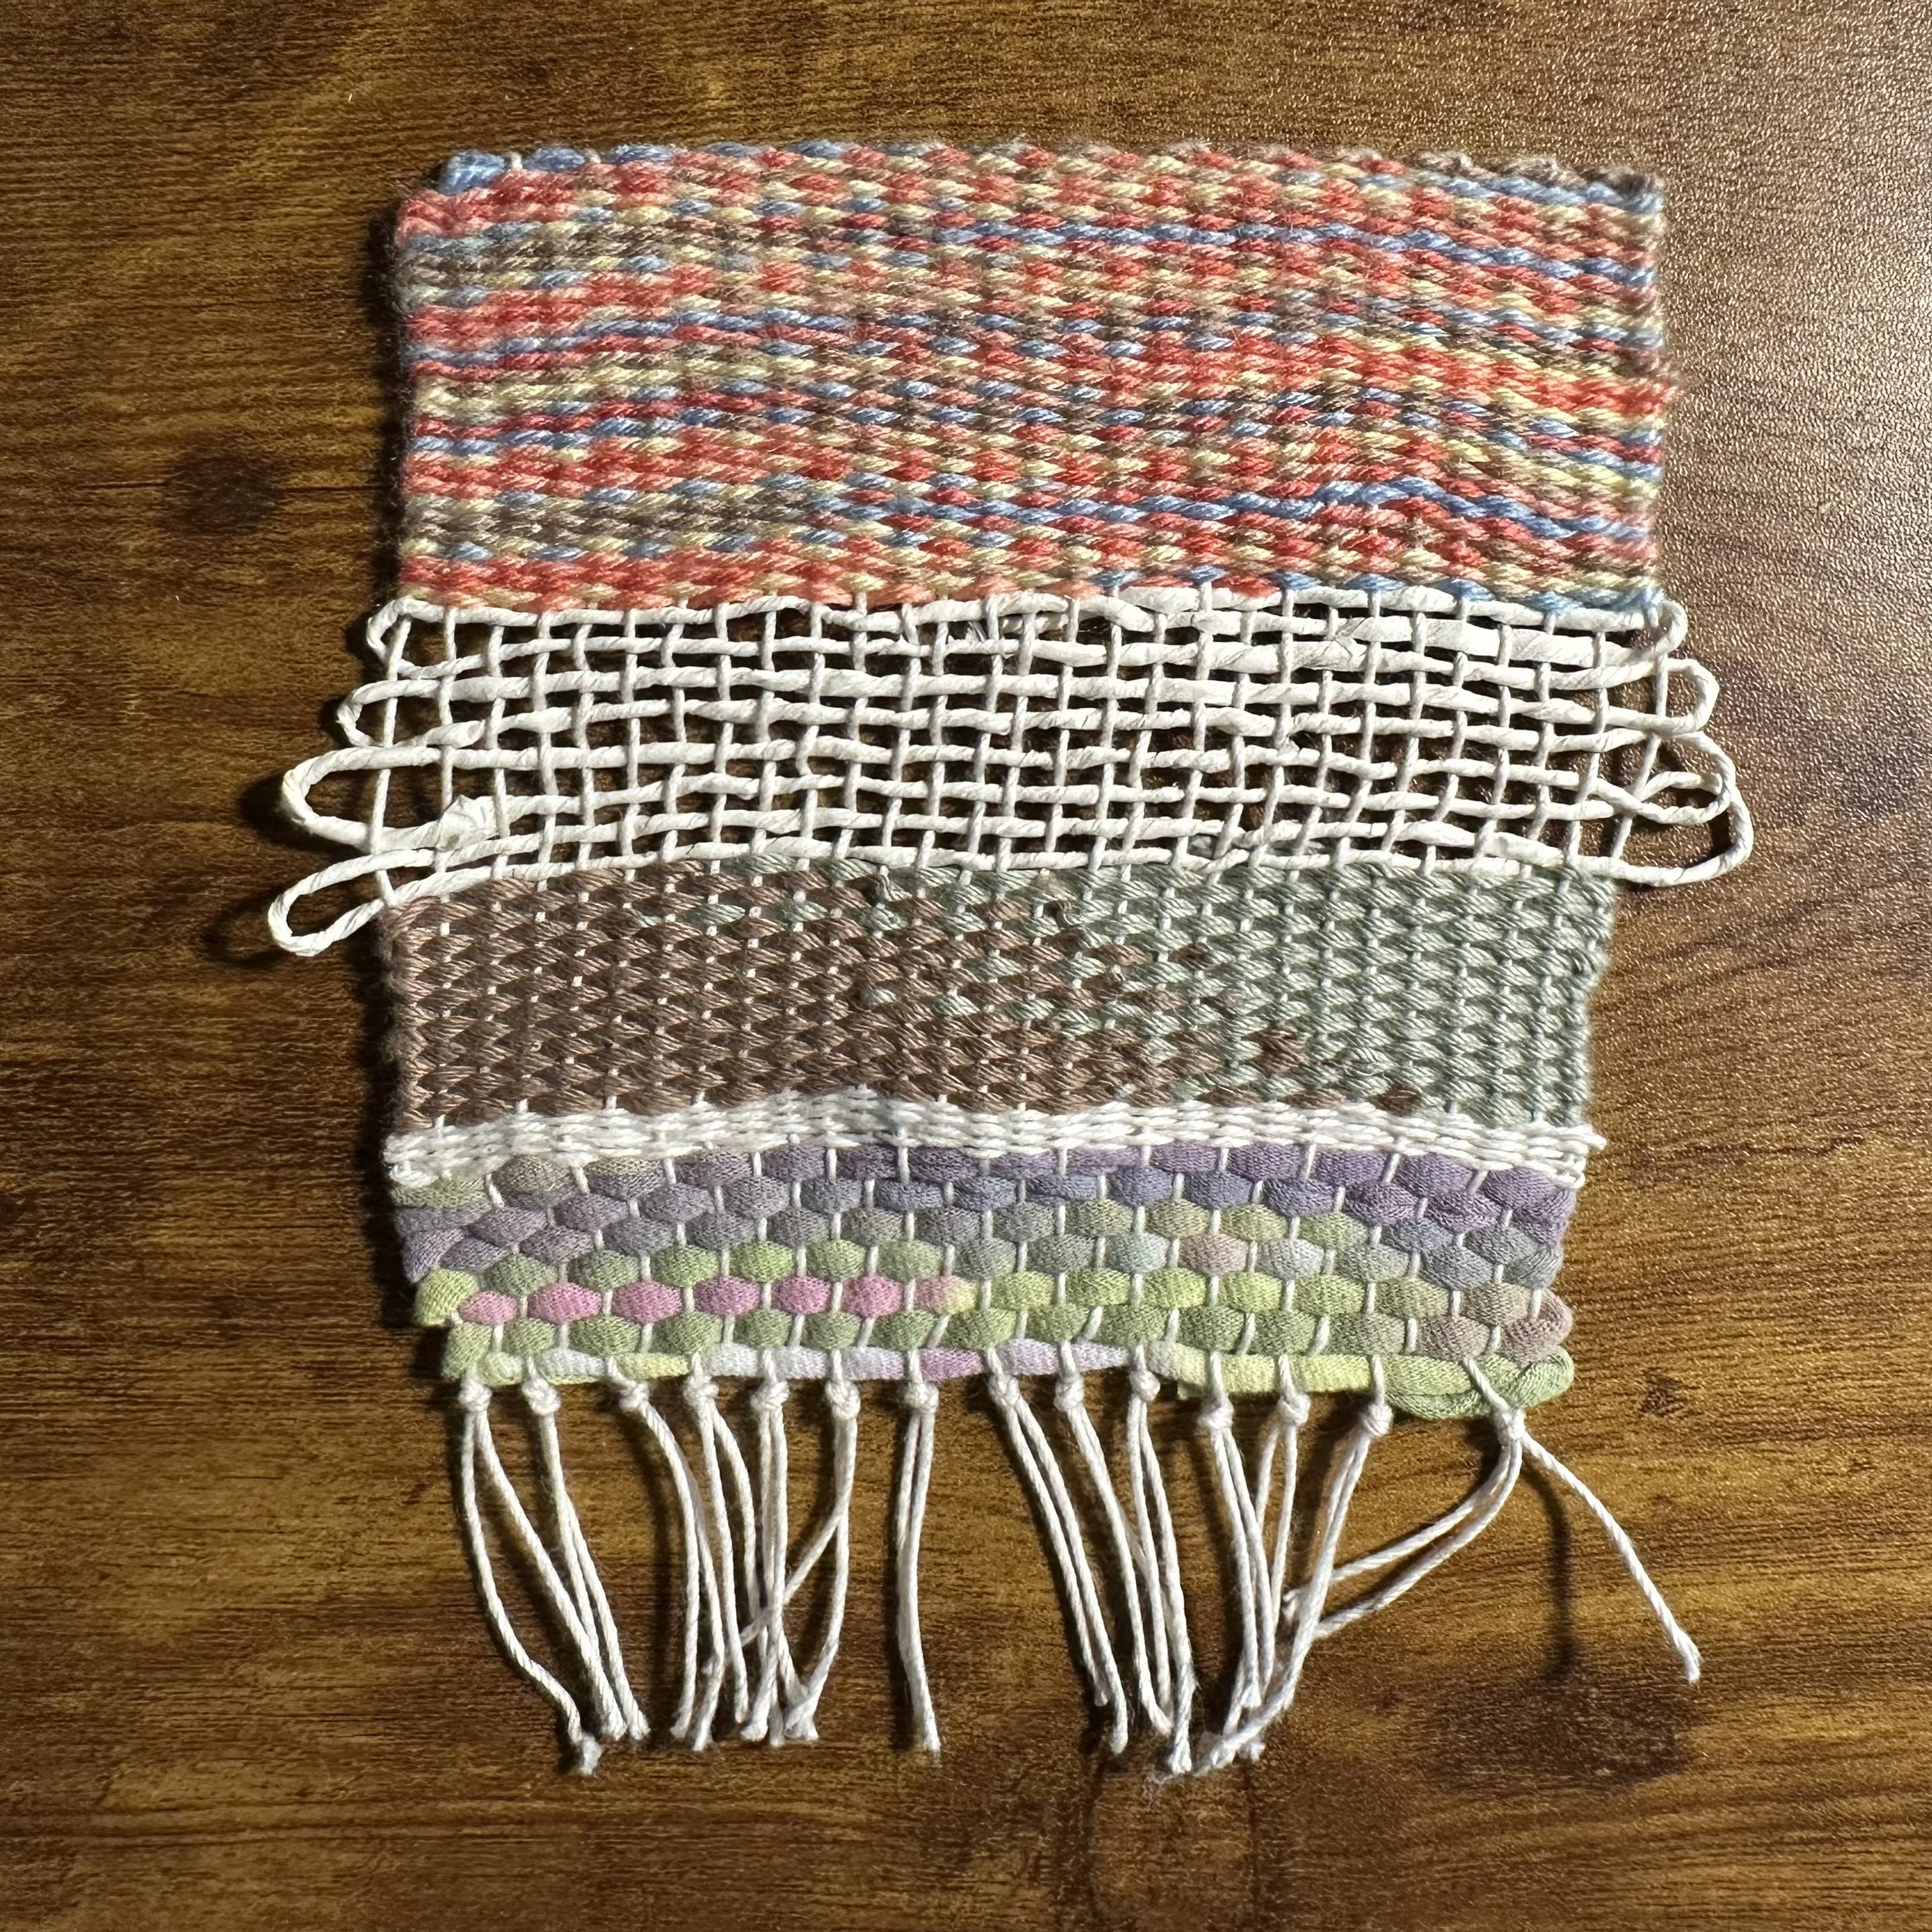
Alternatively, you could cut the long loops and display them more like tassels.
Thank you so much for purchasing a laser-cut loom from me. Your support helps me to continue providing opportunities for others to learn how to weave, and it helps me create more woven artwork!
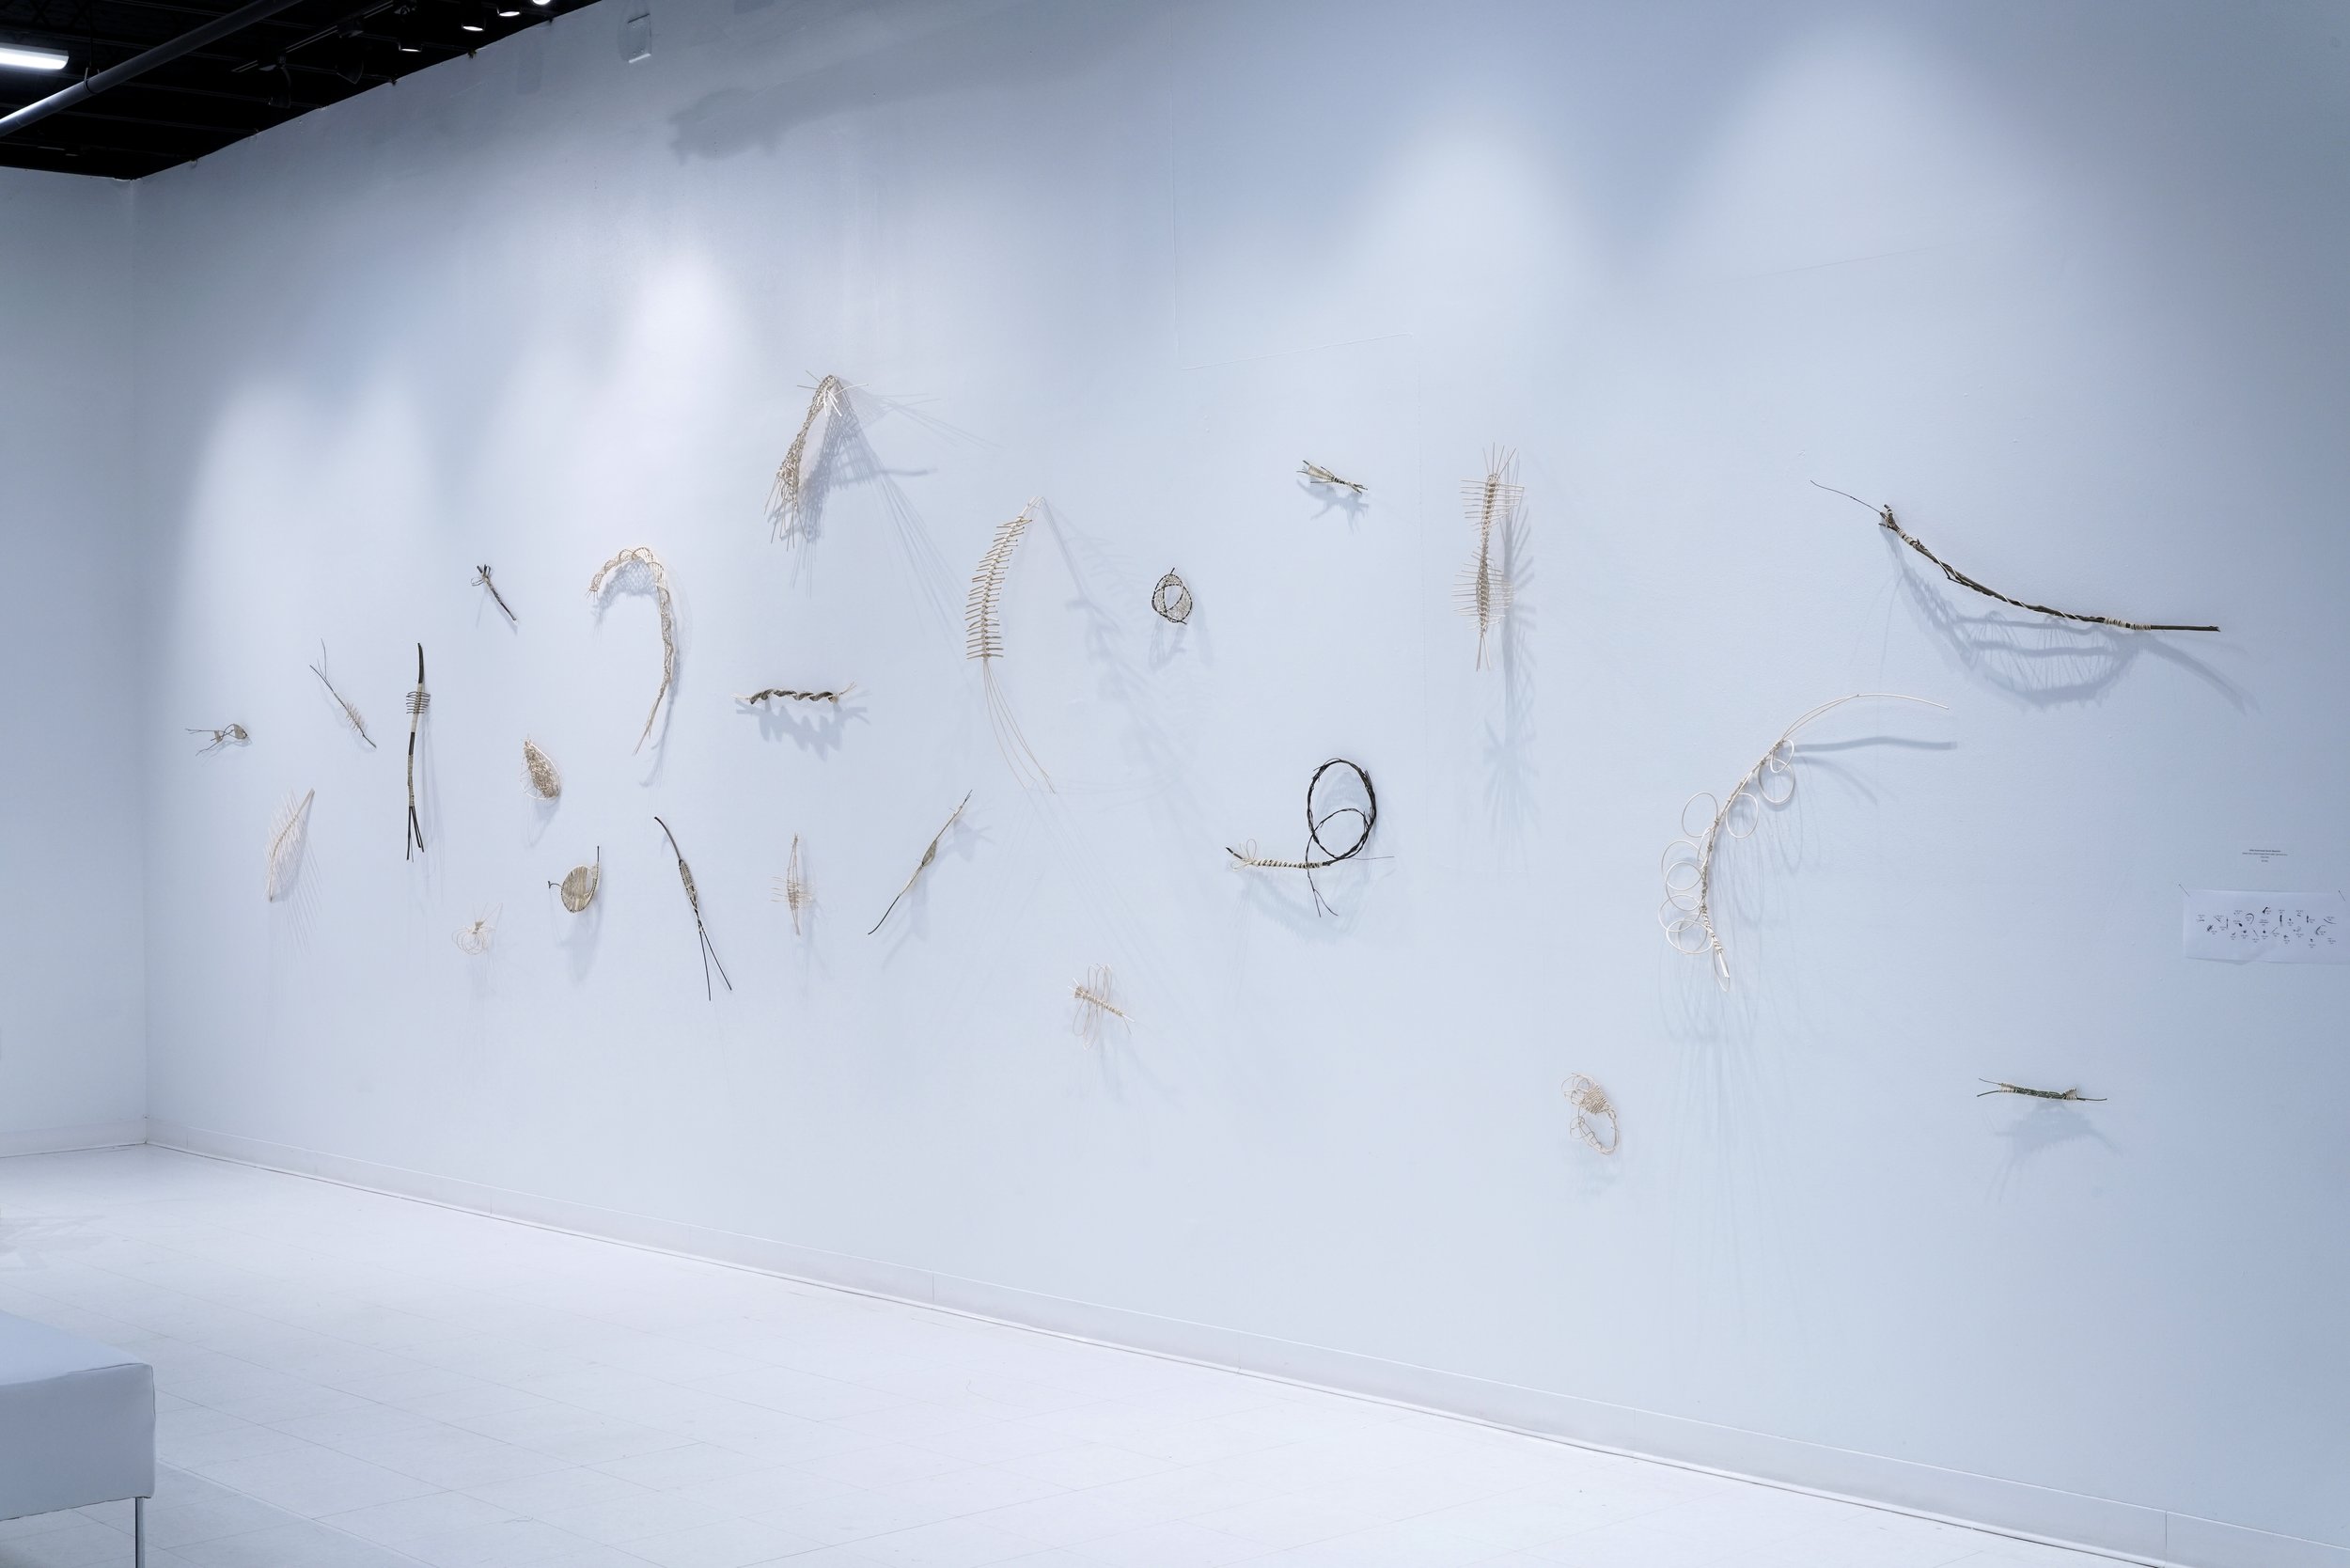
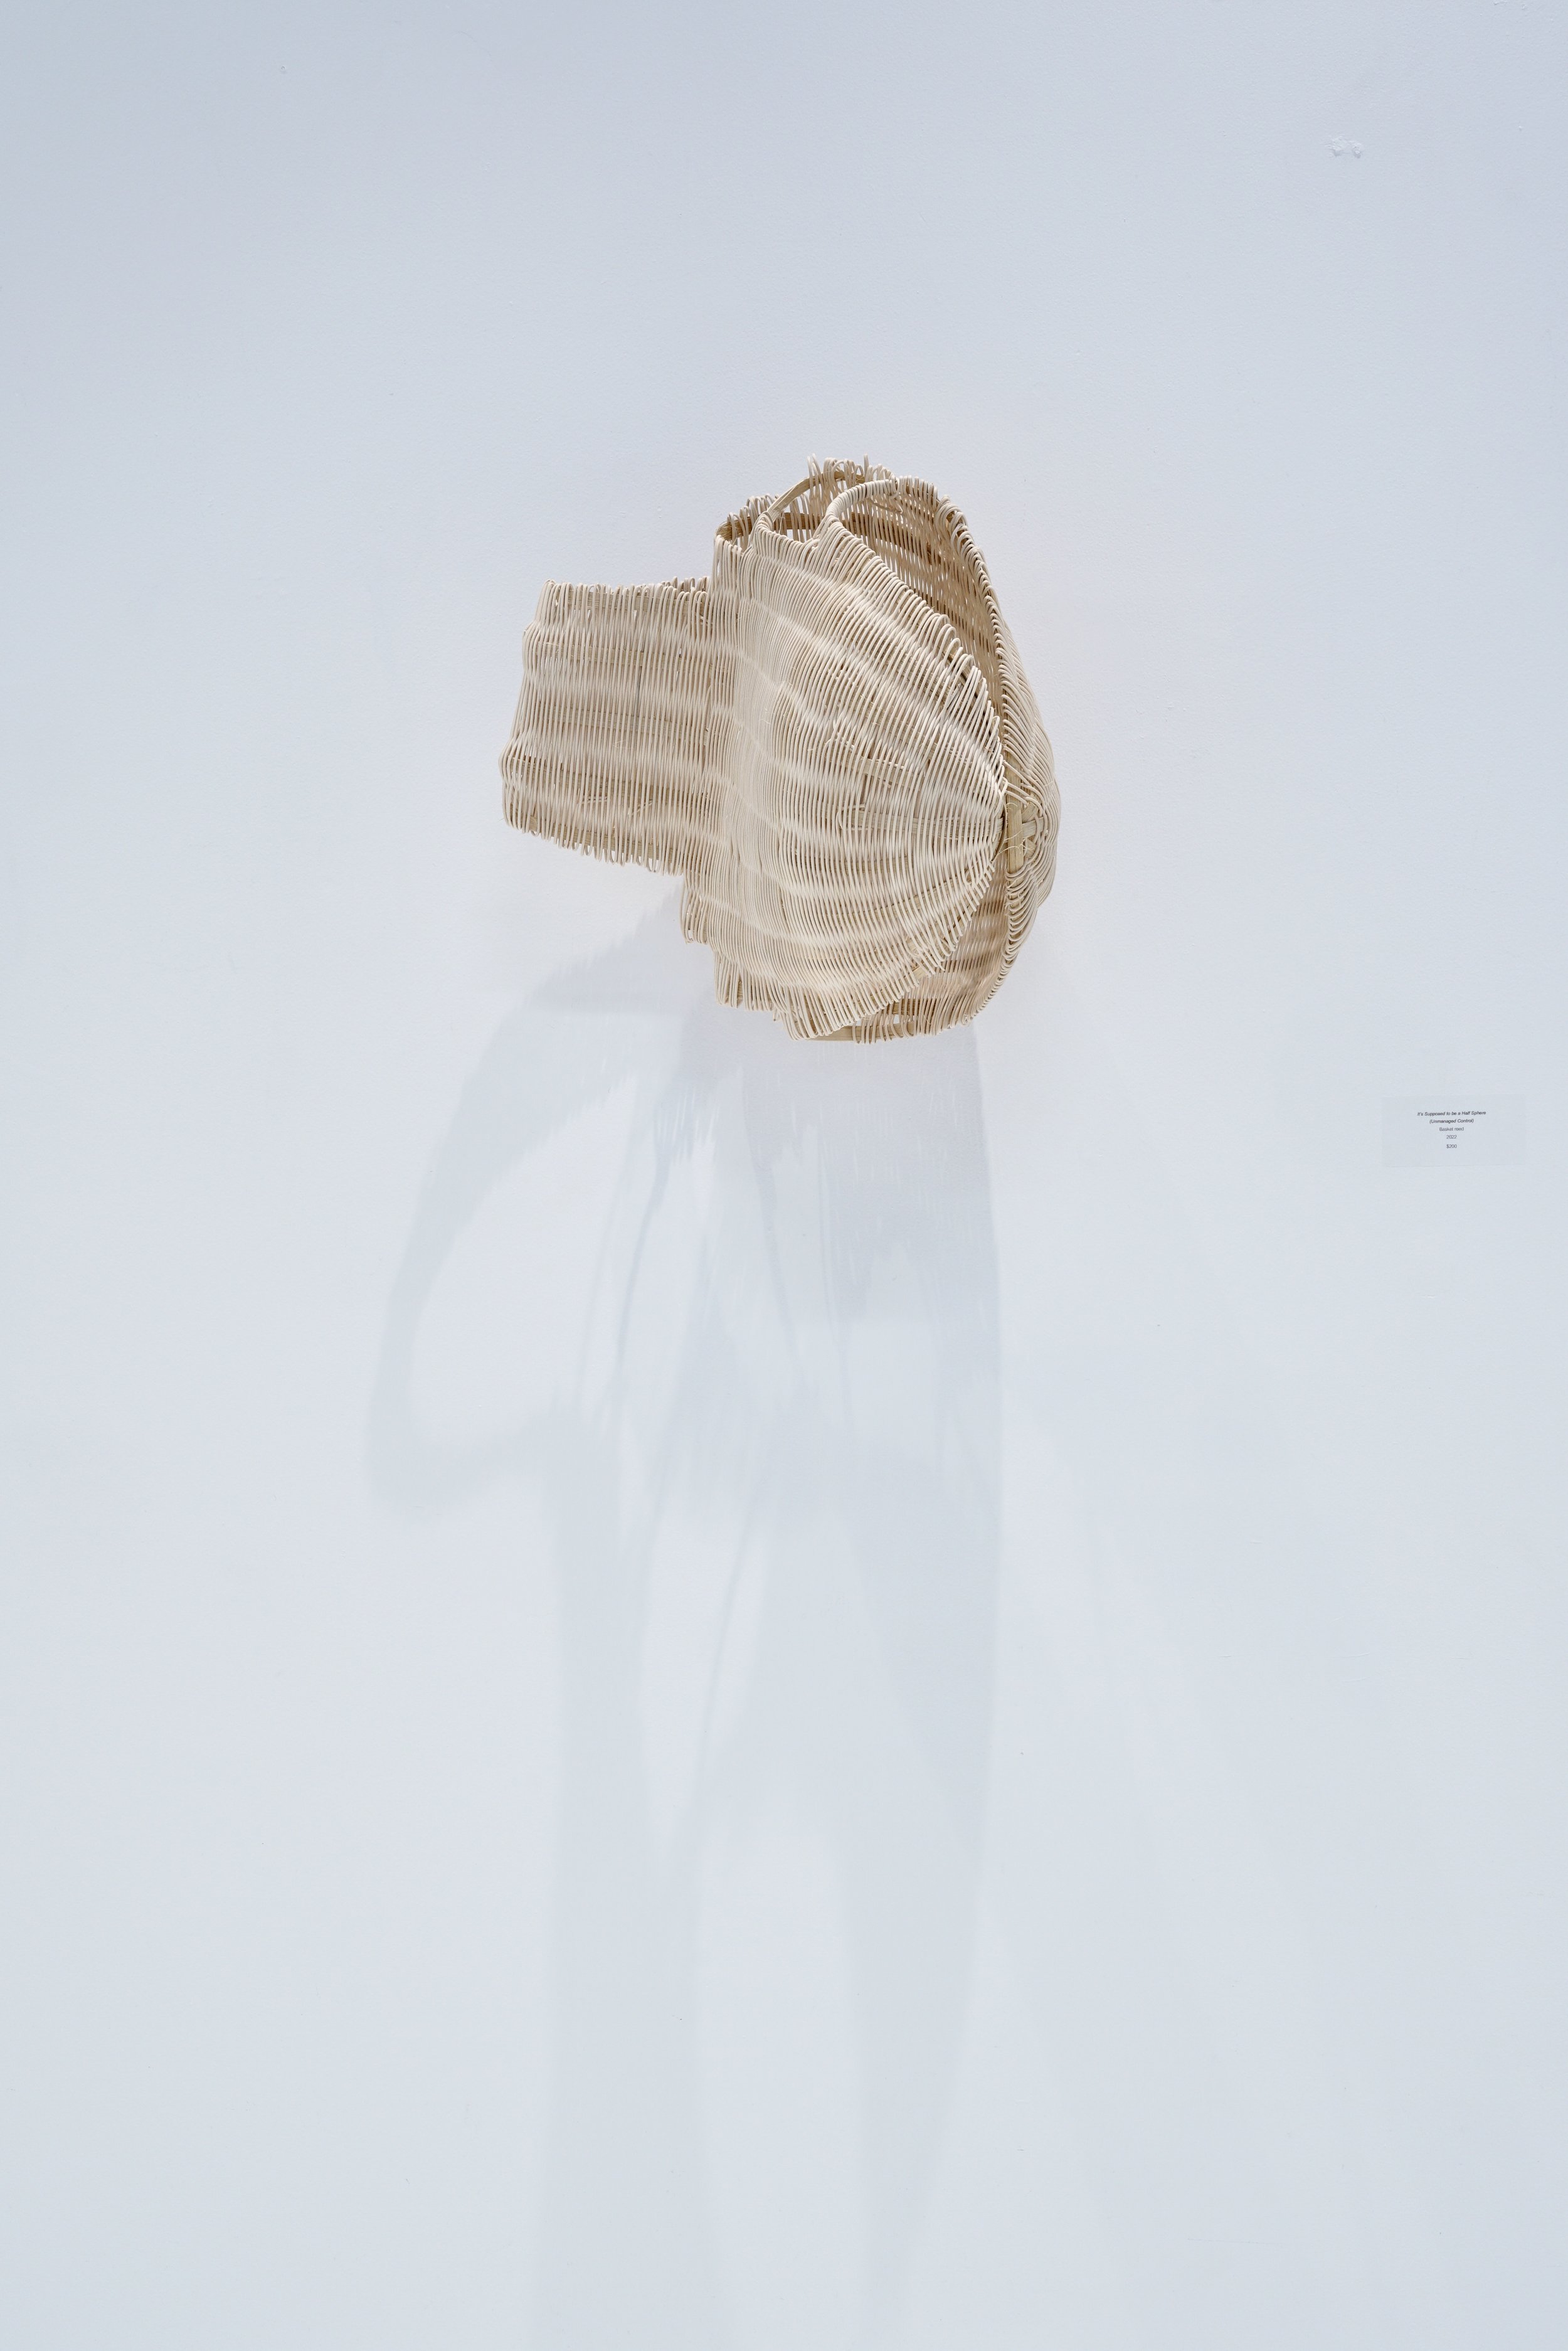
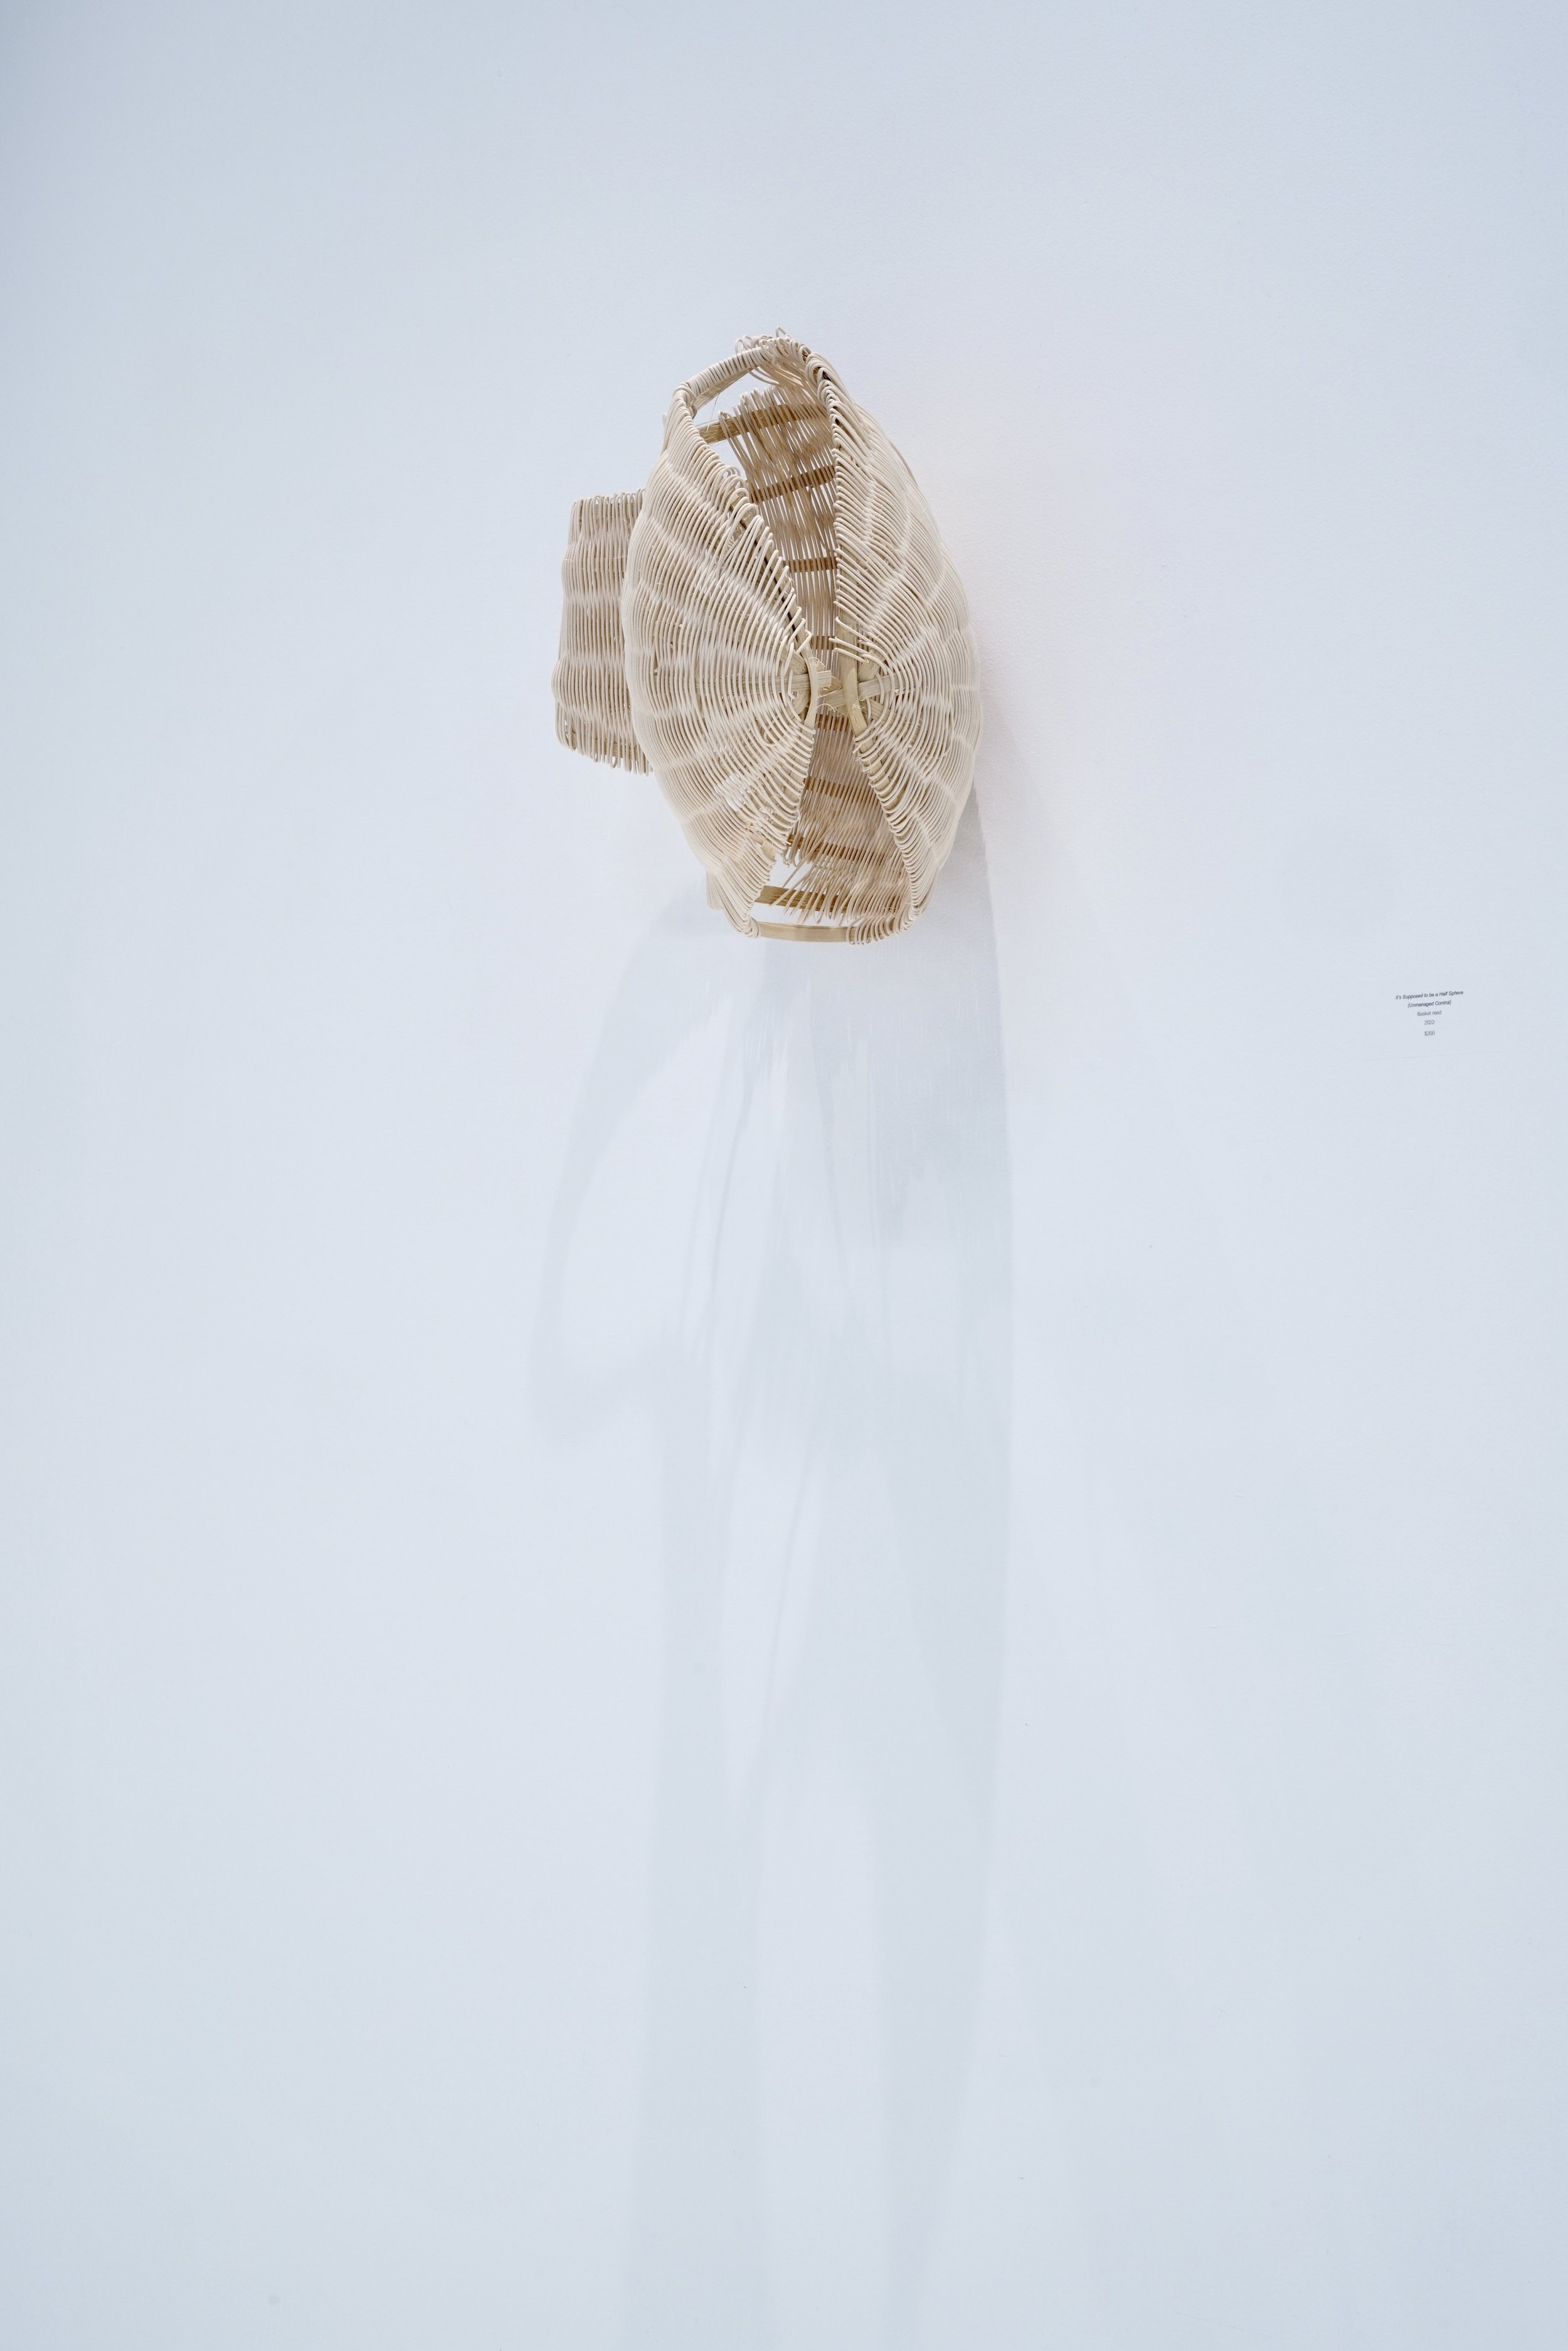
While you’re here, check out more of my sculptural fiber artwork: